At the start of the transaction, you have the choice to apply a task template or input tasks as you go along. In this article, it will break down the different options and capabilities you have within.
TABLE OF CONTENTS
Related Resources
Articles
Applying Task Template
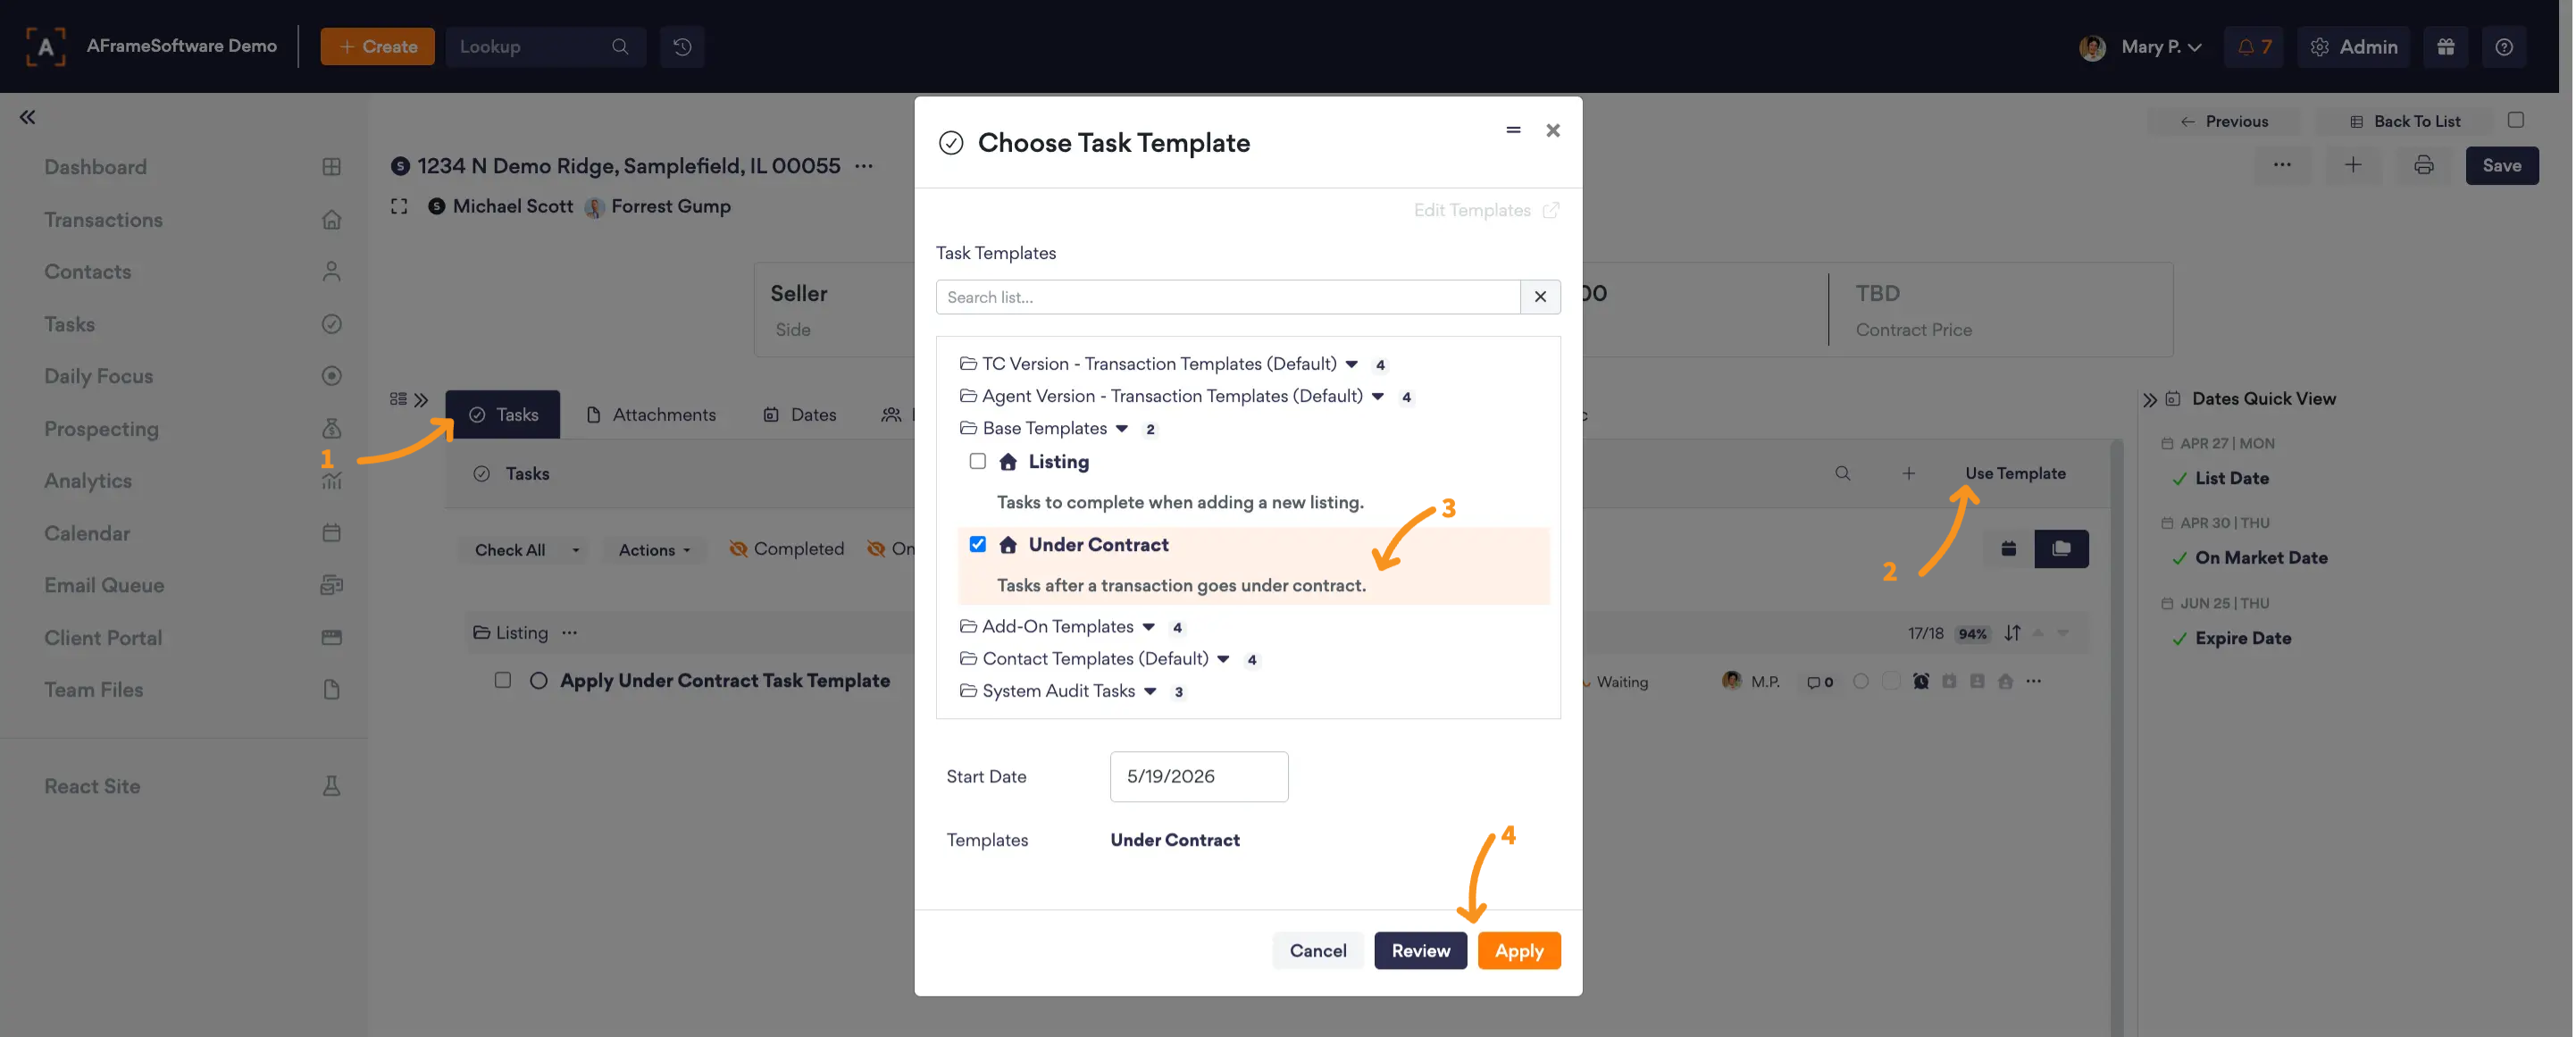
- Click on the Task Tab
- Click on Use Template
- Select the Task Template(s) to apply to the transaction. When you apply a template, the Start Date will automatically be set to today, but it is editable. This date tells AFrame how to auto-assign task due dates.
- Choose to click on Apply or Review. The review screen allows you to exclude a task, reassign a task, or adjust a due date.
Managing Tasks
Editing Tasks
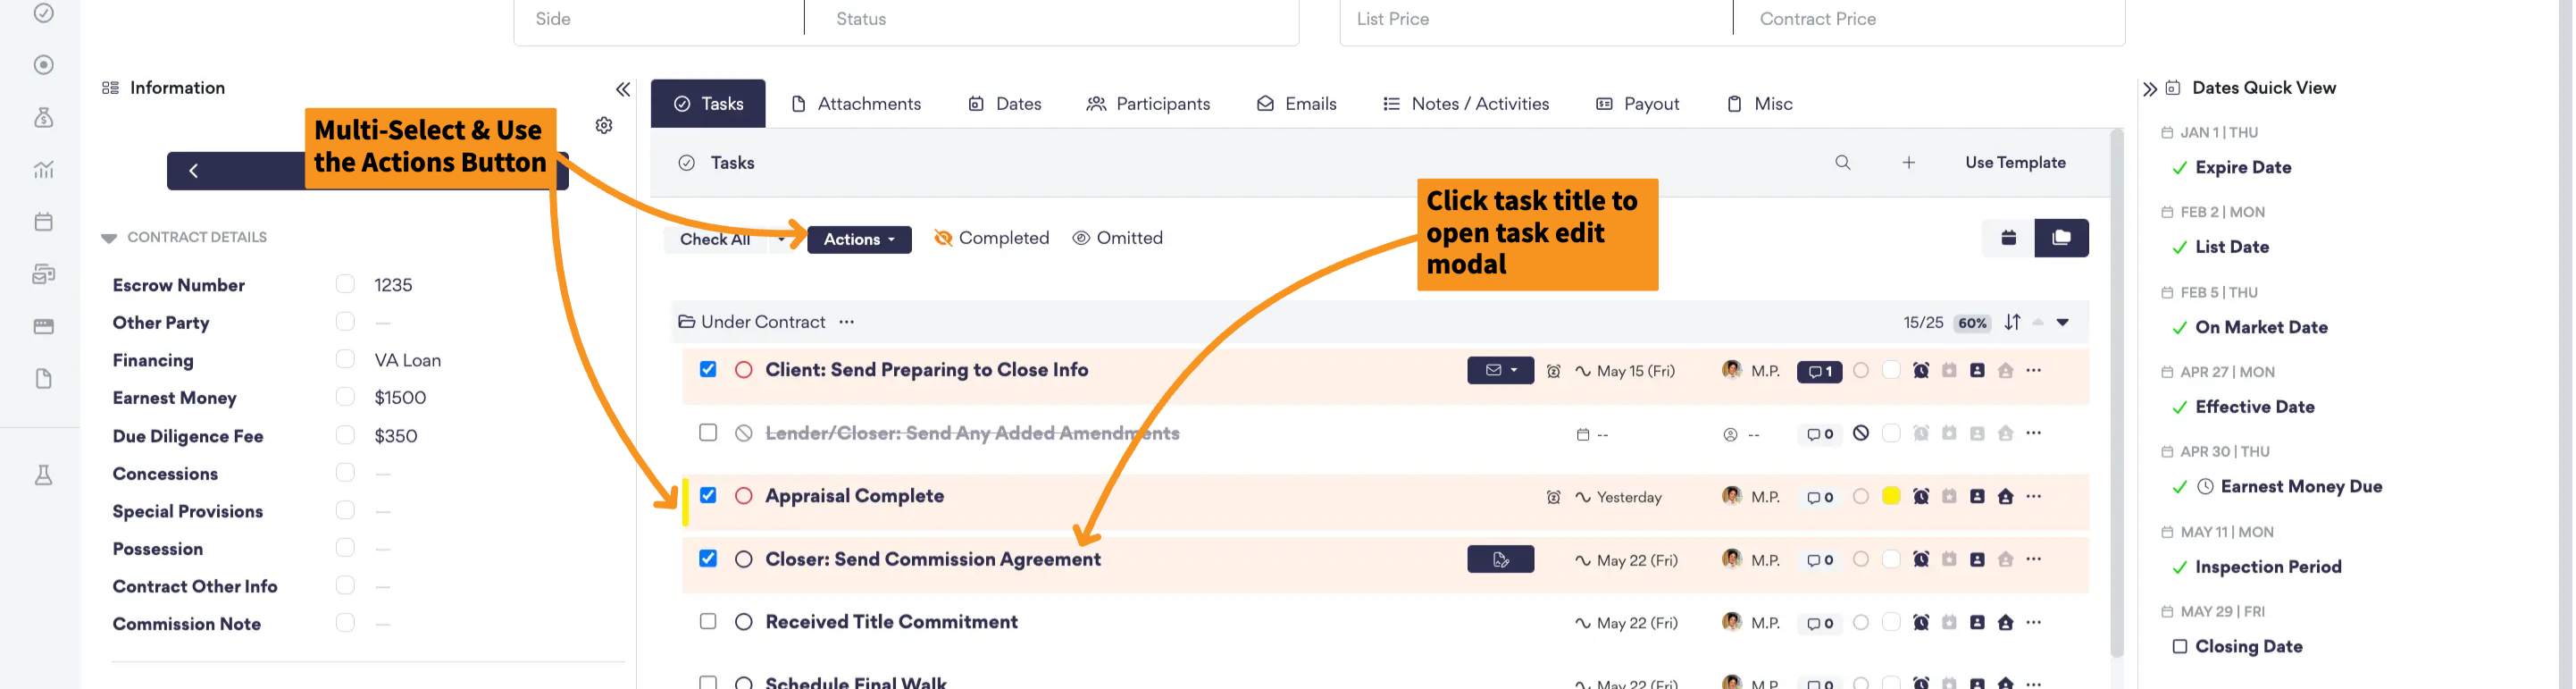
Simply select the task title to open the full edit screen. You can also multi-select tasks and use the Actions button to update multiple tasks at once.
Viewing Tasks
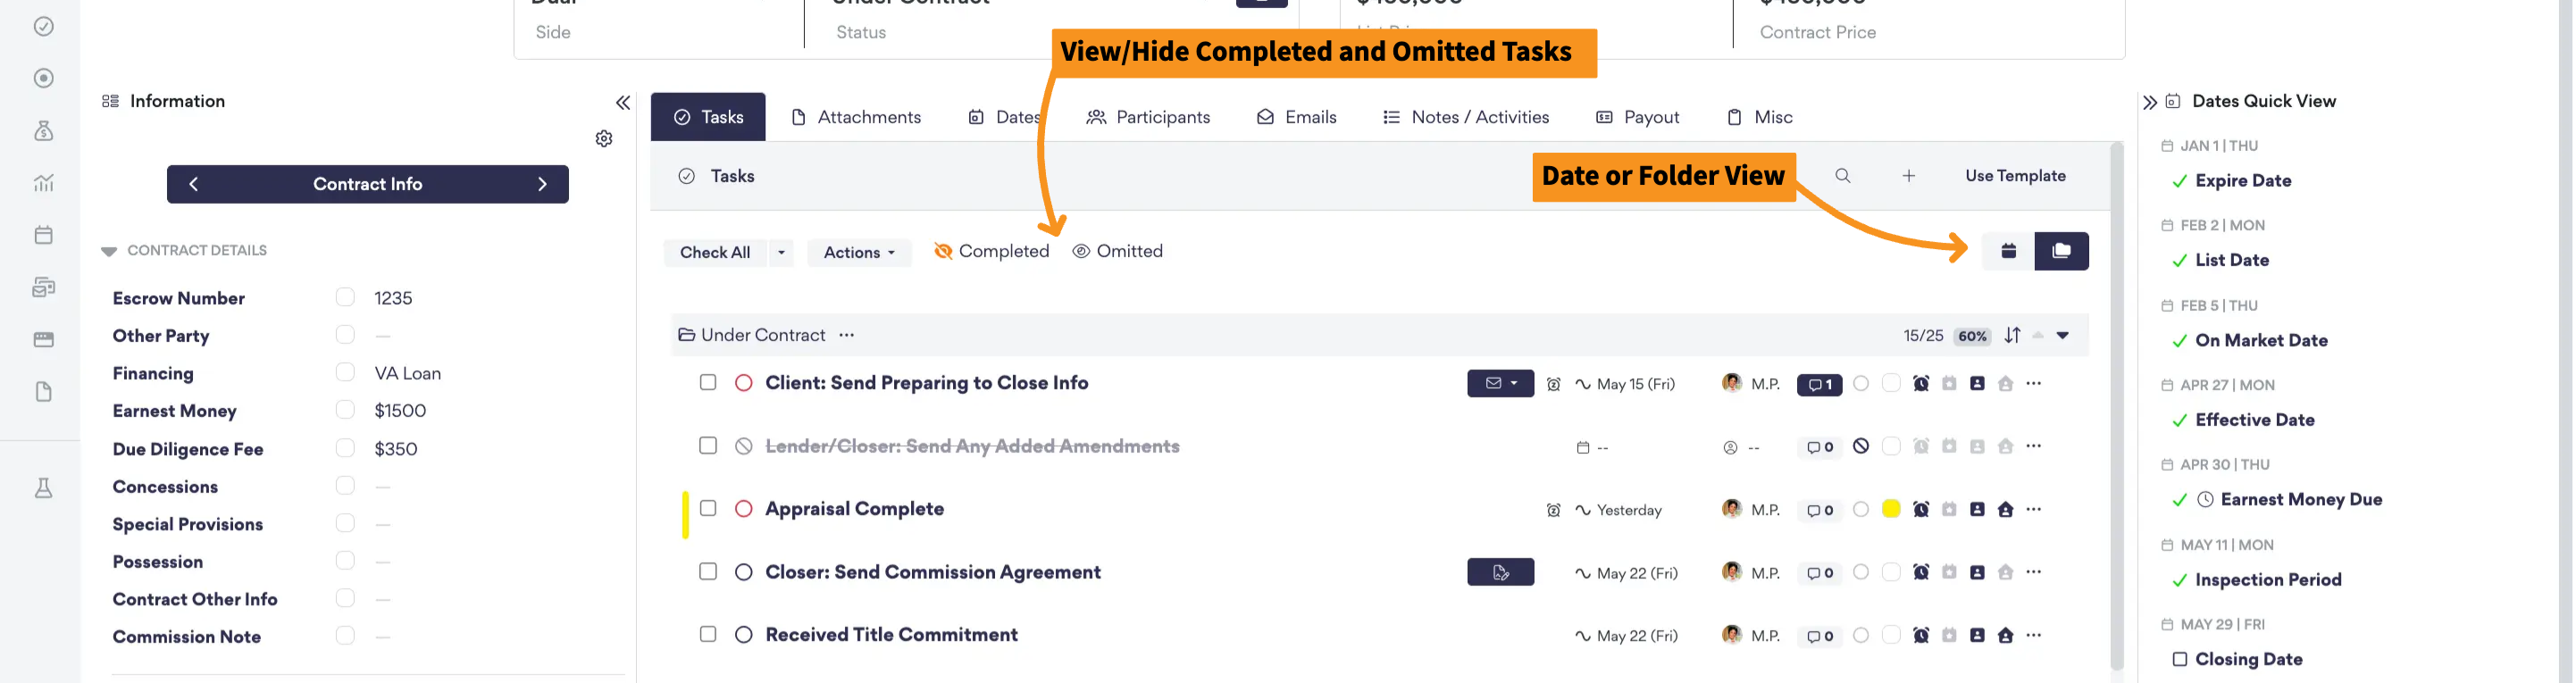
Use the viewing toggles to switch between viewing tasks in date order or by folder. The default is folder view, which groups tasks by task template folder. You can also toggle filters to hide or show completed and omitted tasks to help streamline your task list. These settings apply to all transactions in your account.
Creating Linked Email or Letter (PDF)
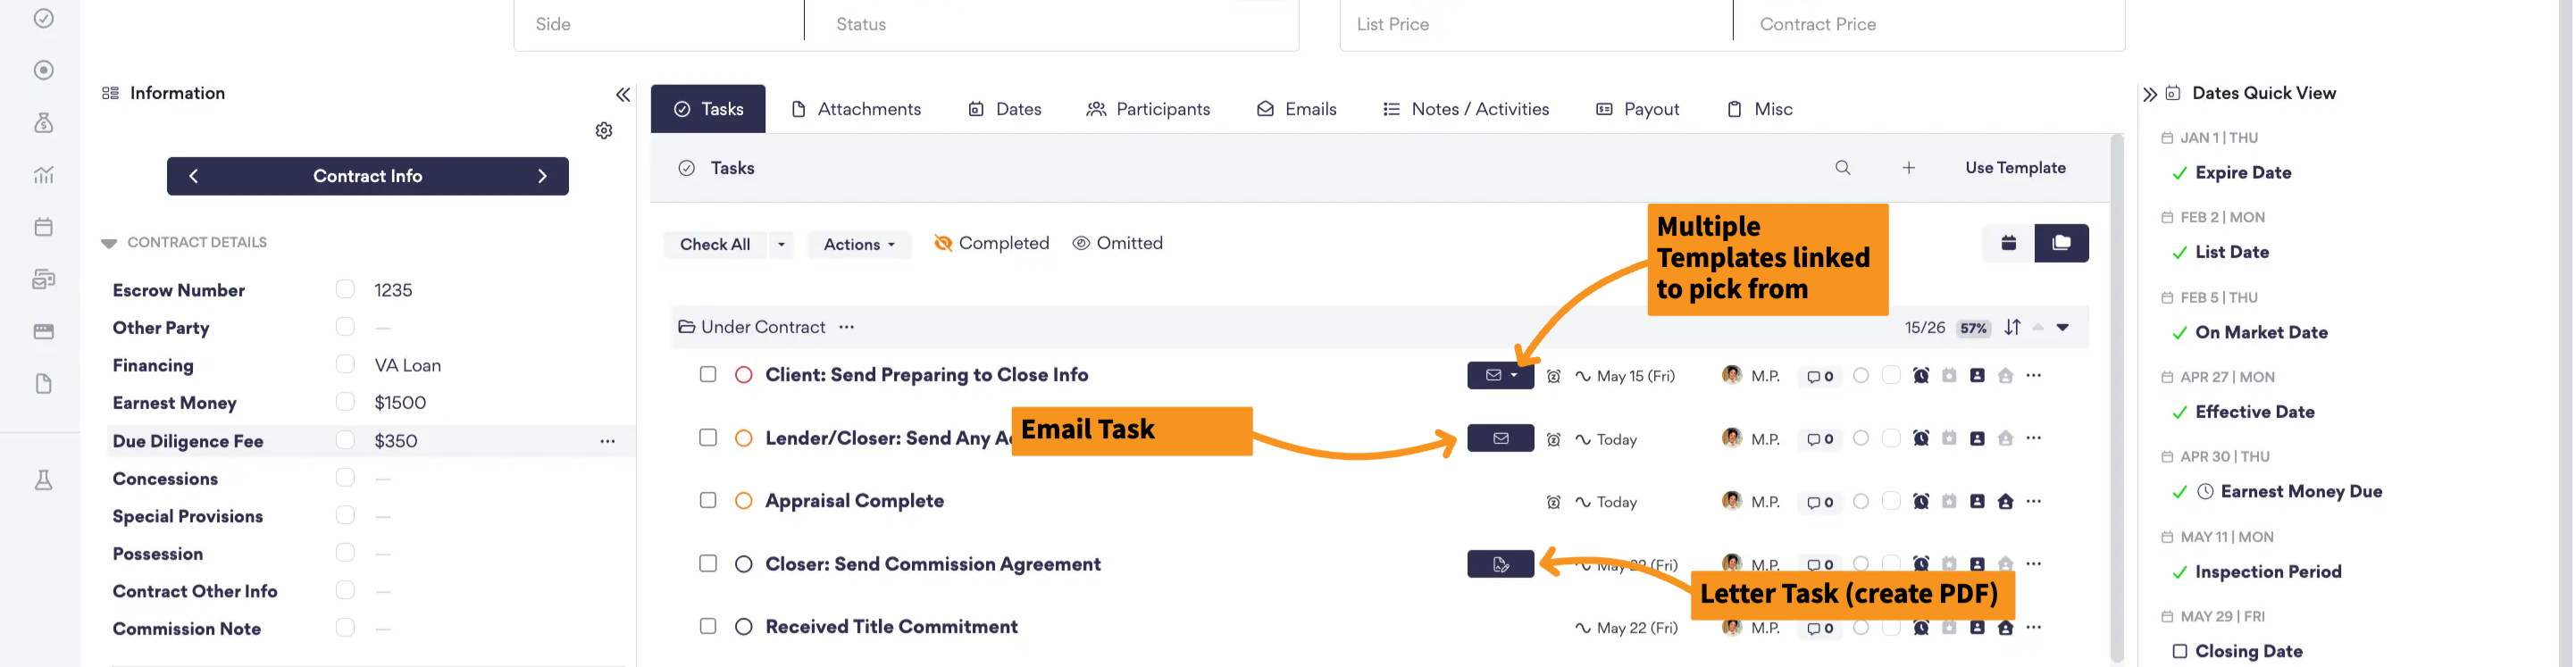
If there is an email or letter task, then you can click the shortcut Create button to create the predetermined email/letter template that was assigned in the task template.
Other Quick Actions
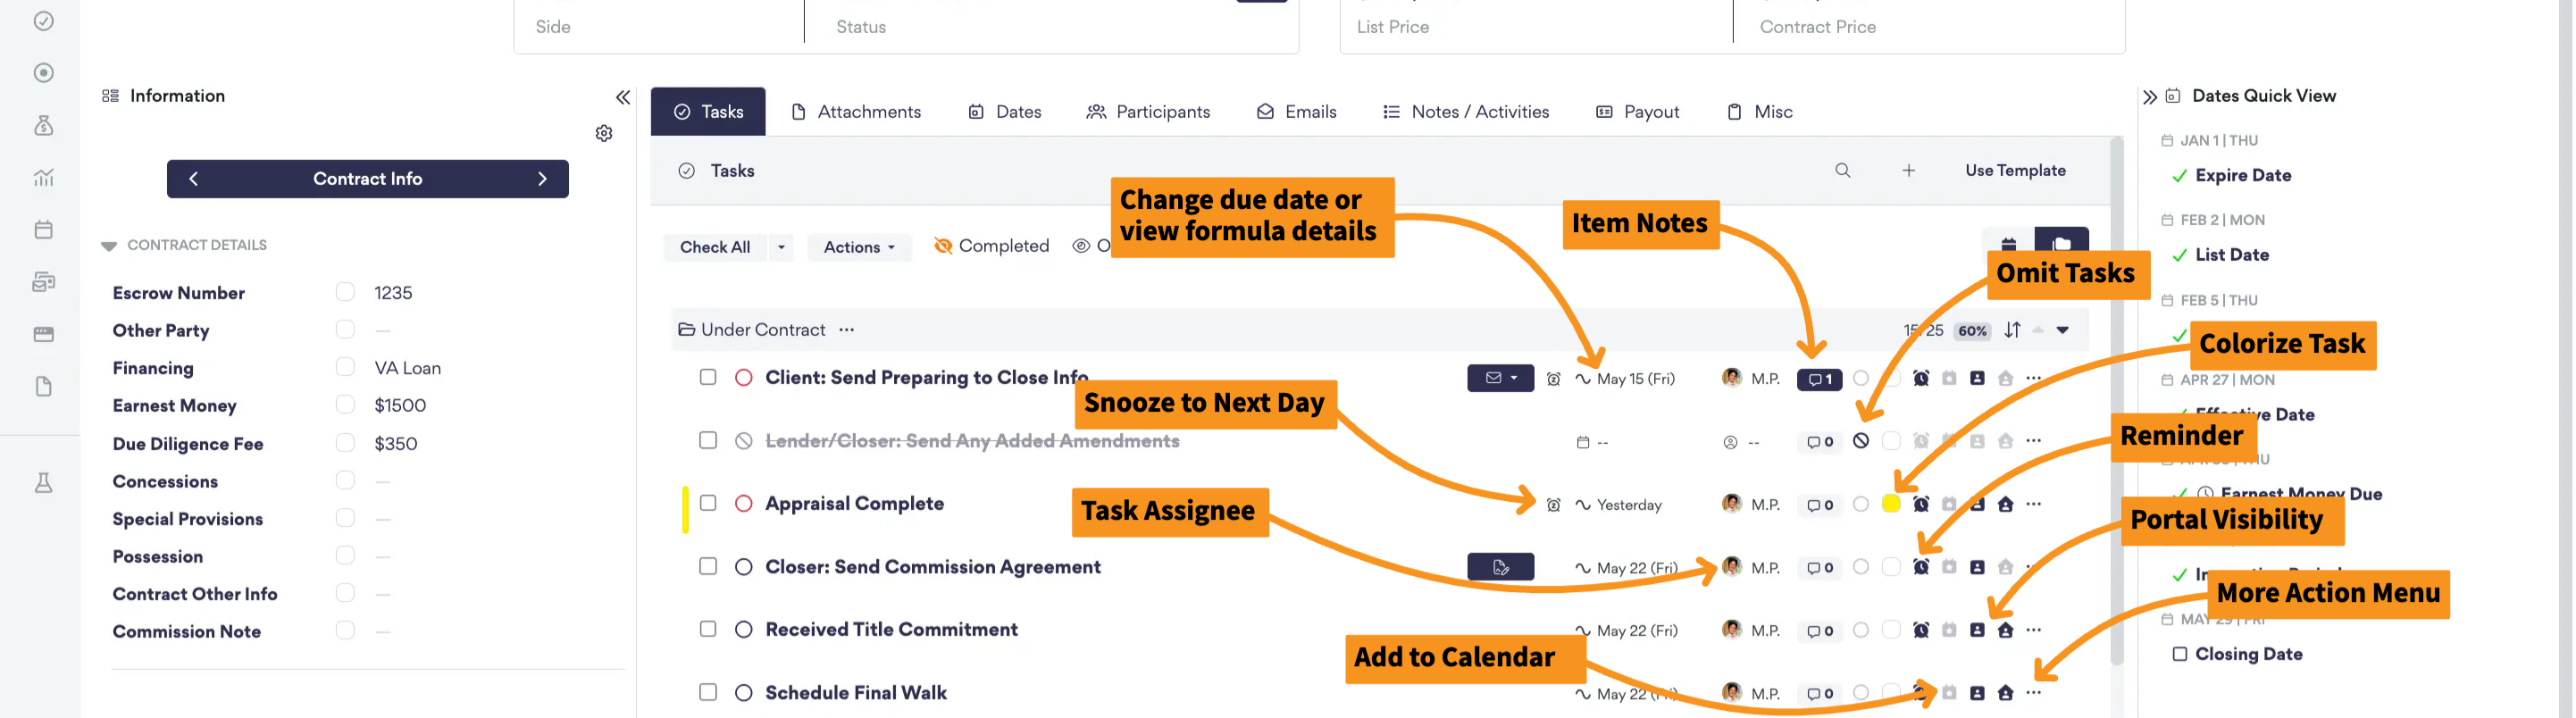
Quick actions allow you to manage tasks directly from the task list without opening each one. You can snooze the due date to the next day, change the assignee, update the due date, add a note, omit the task, colorize it for organization, turn reminders on, add it to your calendar feed, manage portal visibility, or use the More Actions menu for additional options.