At the start of the transaction, you have the choice to apply an attachment template or upload attachments (files or web links) as you go along. In this article, it will break down the different options and capabilities you have within this tab.
TABLE OF CONTENTS
Related Resources
Articles
Applying A Template
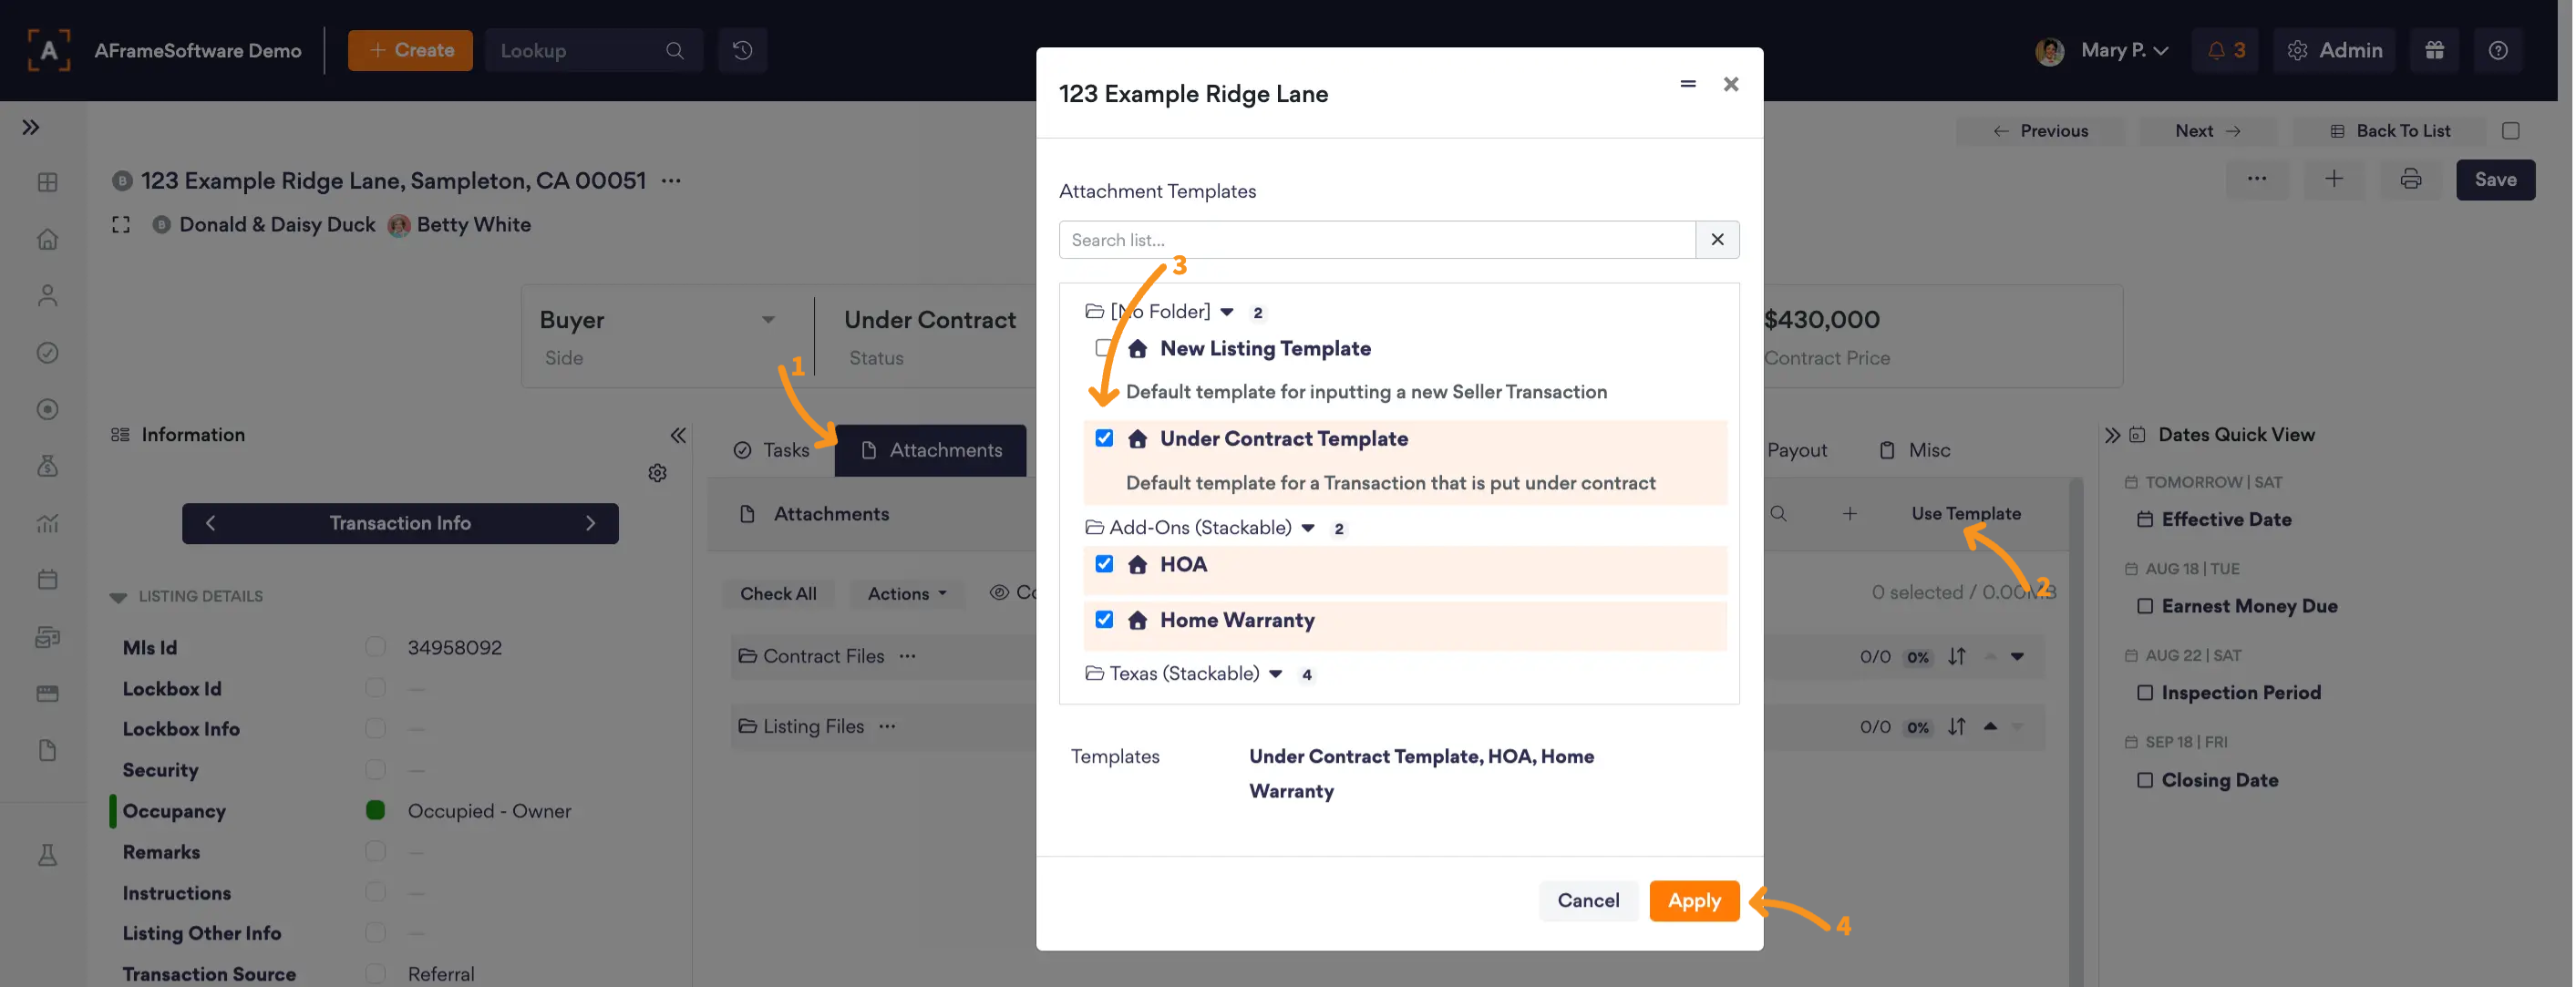
From within the Transaction Detail Page, click on the Attachment Tab
Click on Use Template
Select the Attachment Template(s) to apply to the transaction
Choose to click on Apply
Uploading Attachments
Single Attachment
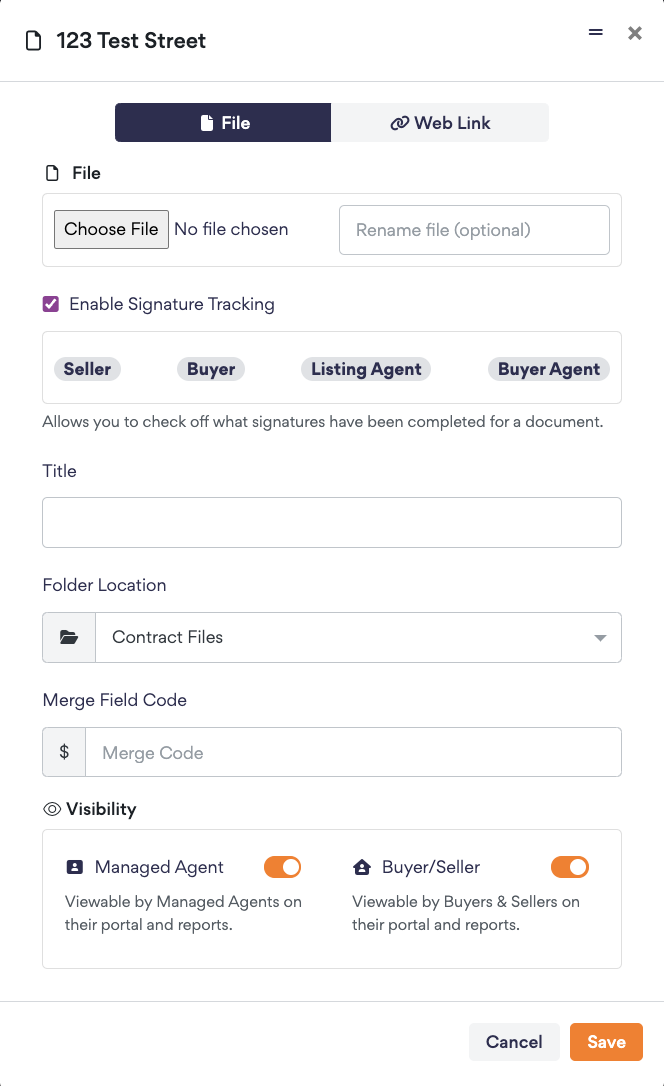
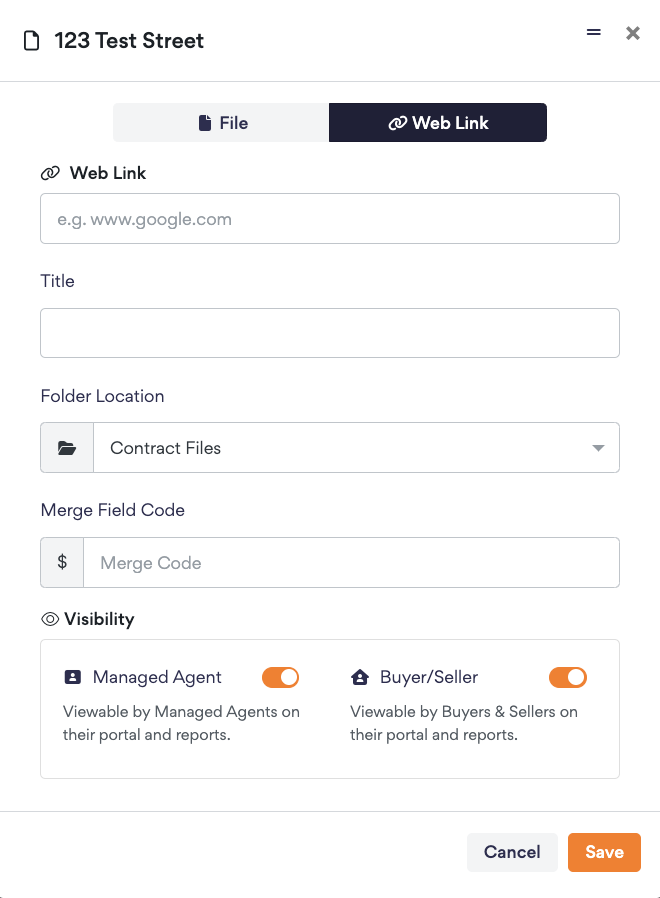
- Click the Placeholder Name to open the edit screen for both weblinks & files. Additionally, if you want to bypass the edit screen for files, you can select the quick upload button.

- Within the edit screen, you can upload the file or paste the web link URL, enable signature tracking for files, enter the title, select a folder location, create custom merge field code, and manage the portal visibility.
Multiple File Attachments
- Click the + button & then the Multiple Files selection.
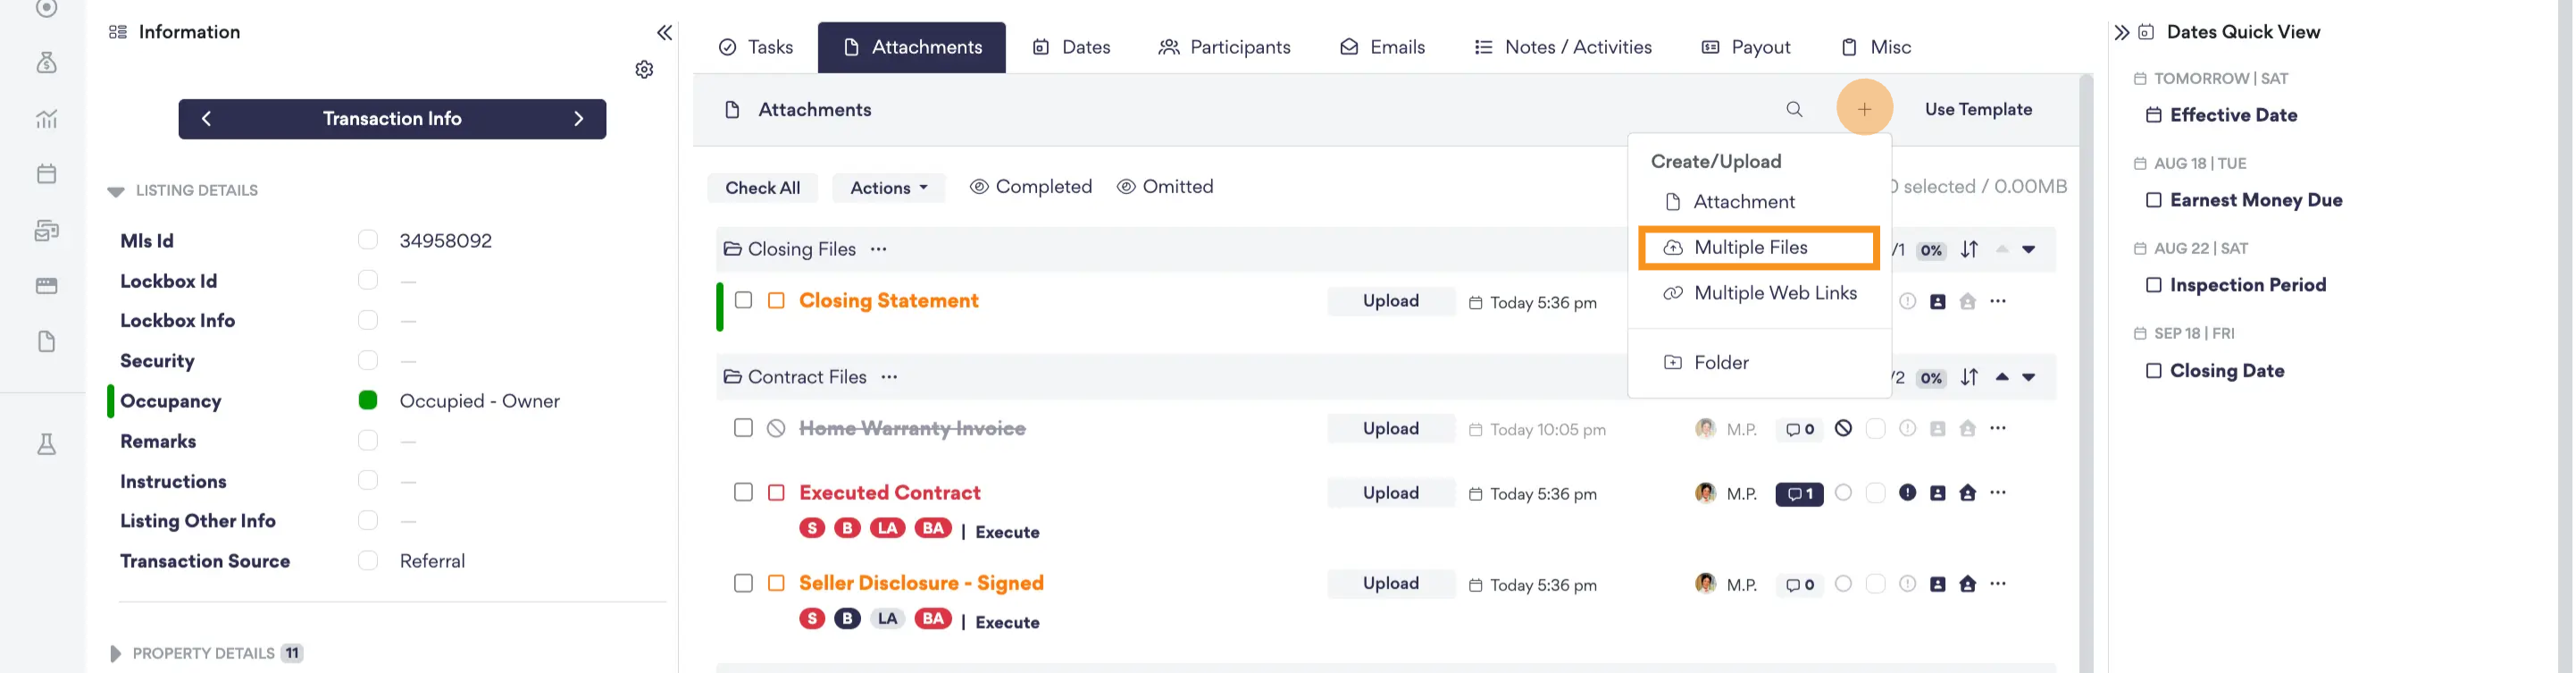
- Upload Multiple Files.
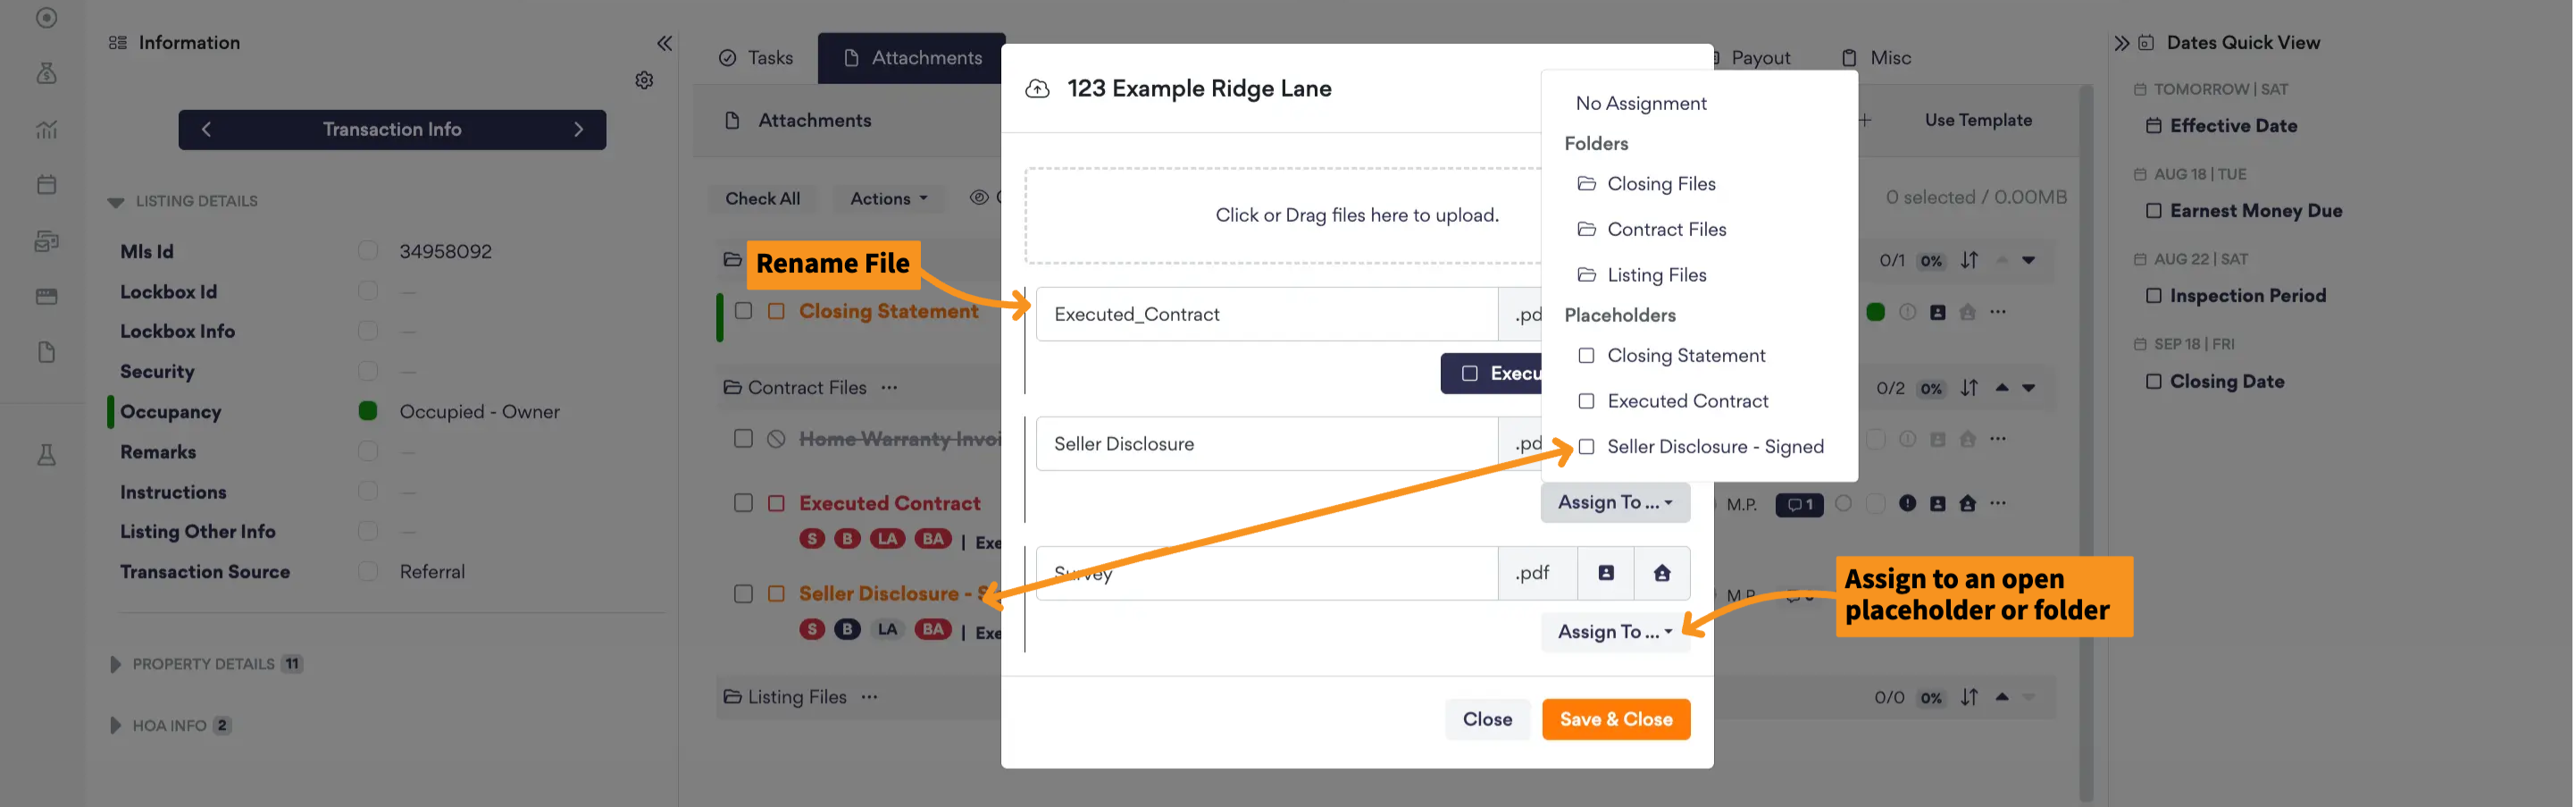
- Rename & assign the files to placeholders/folders.
Managing Attachments
Split
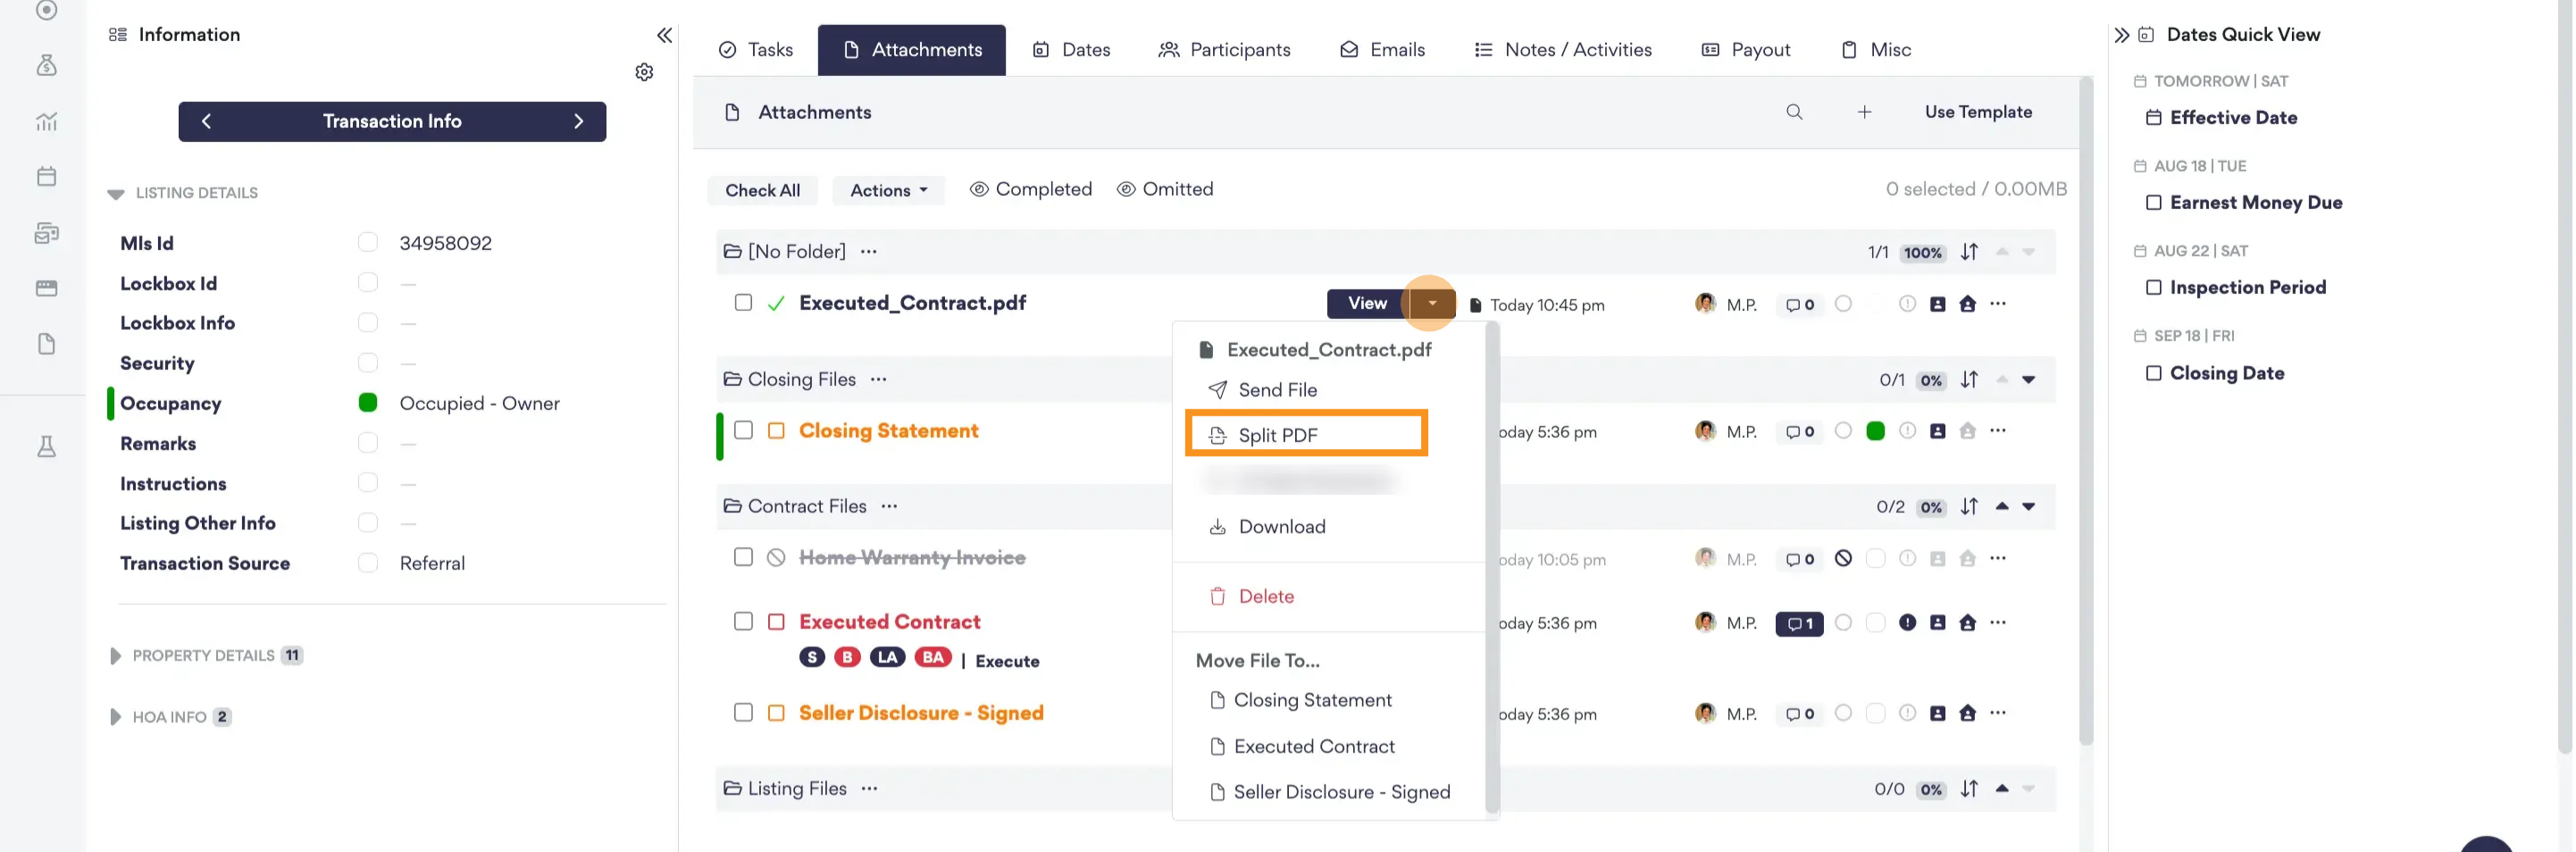
- Upload the combined file you need to split. You do not need to assign the attachment to a placeholder, as you will assign each split to a placeholder or folder.
- Click the dropdown menu on the right side of the file button & select Split PDF.
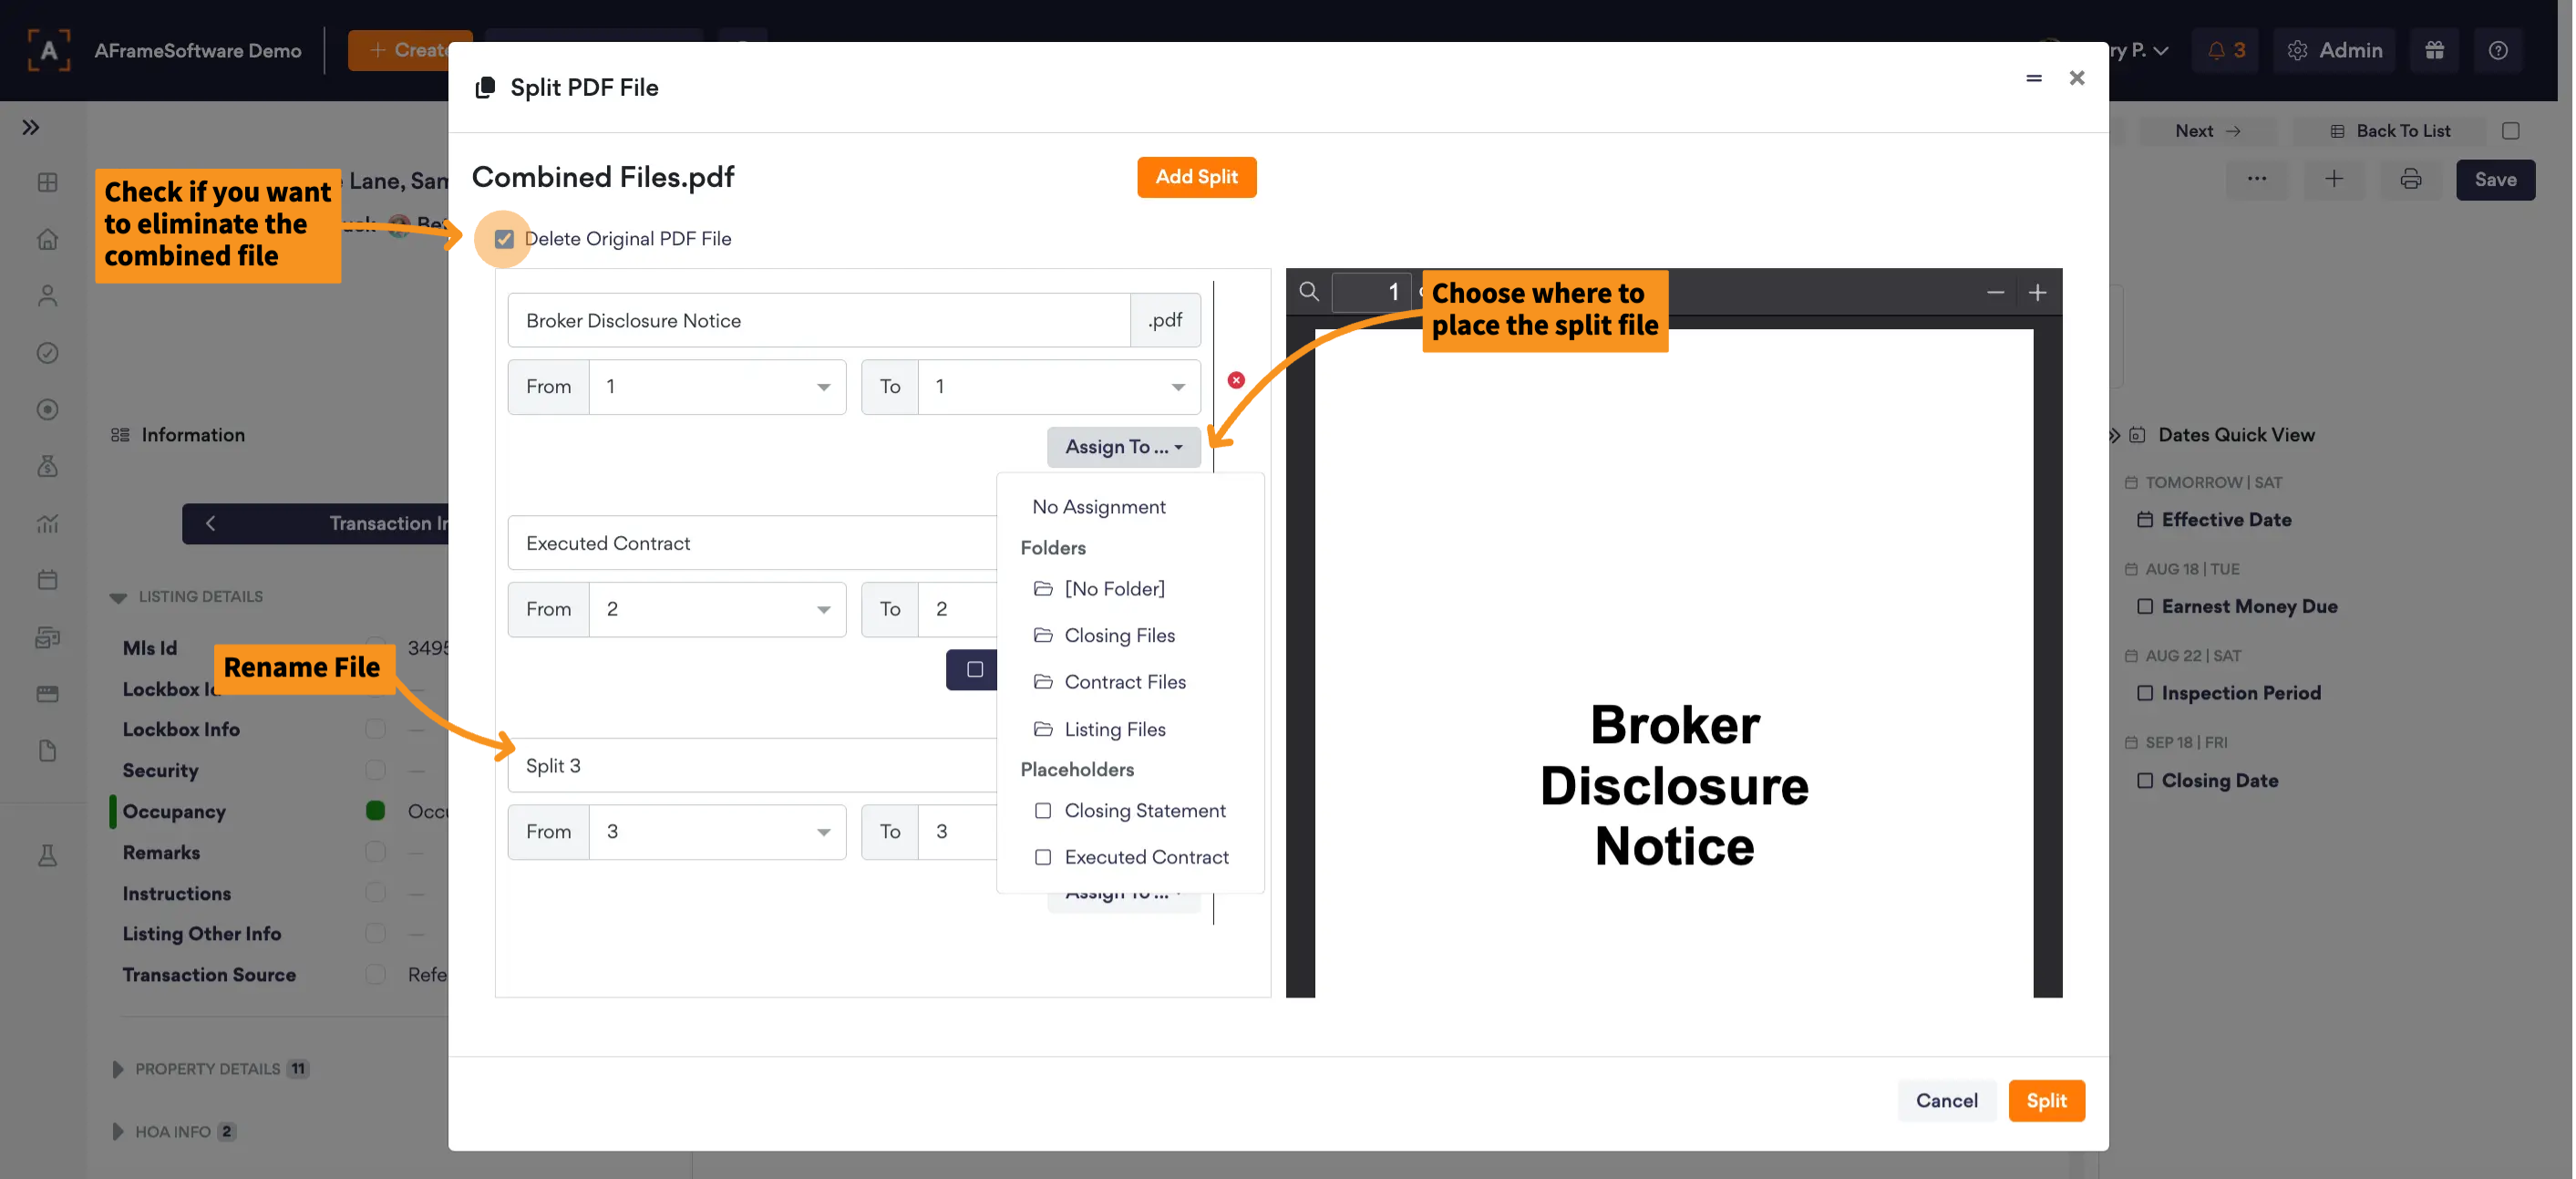
- Add Splits for each section you want to separate. Within each split, you can select which pages to include, rename each split & assign to a placeholder or folder. If you want to eliminate the original combined file, be sure to check the Delete Original PDF File box in the top left corner.
Reassign
- Move To Placeholder: File Dropdown Menu → Select Available Placeholder
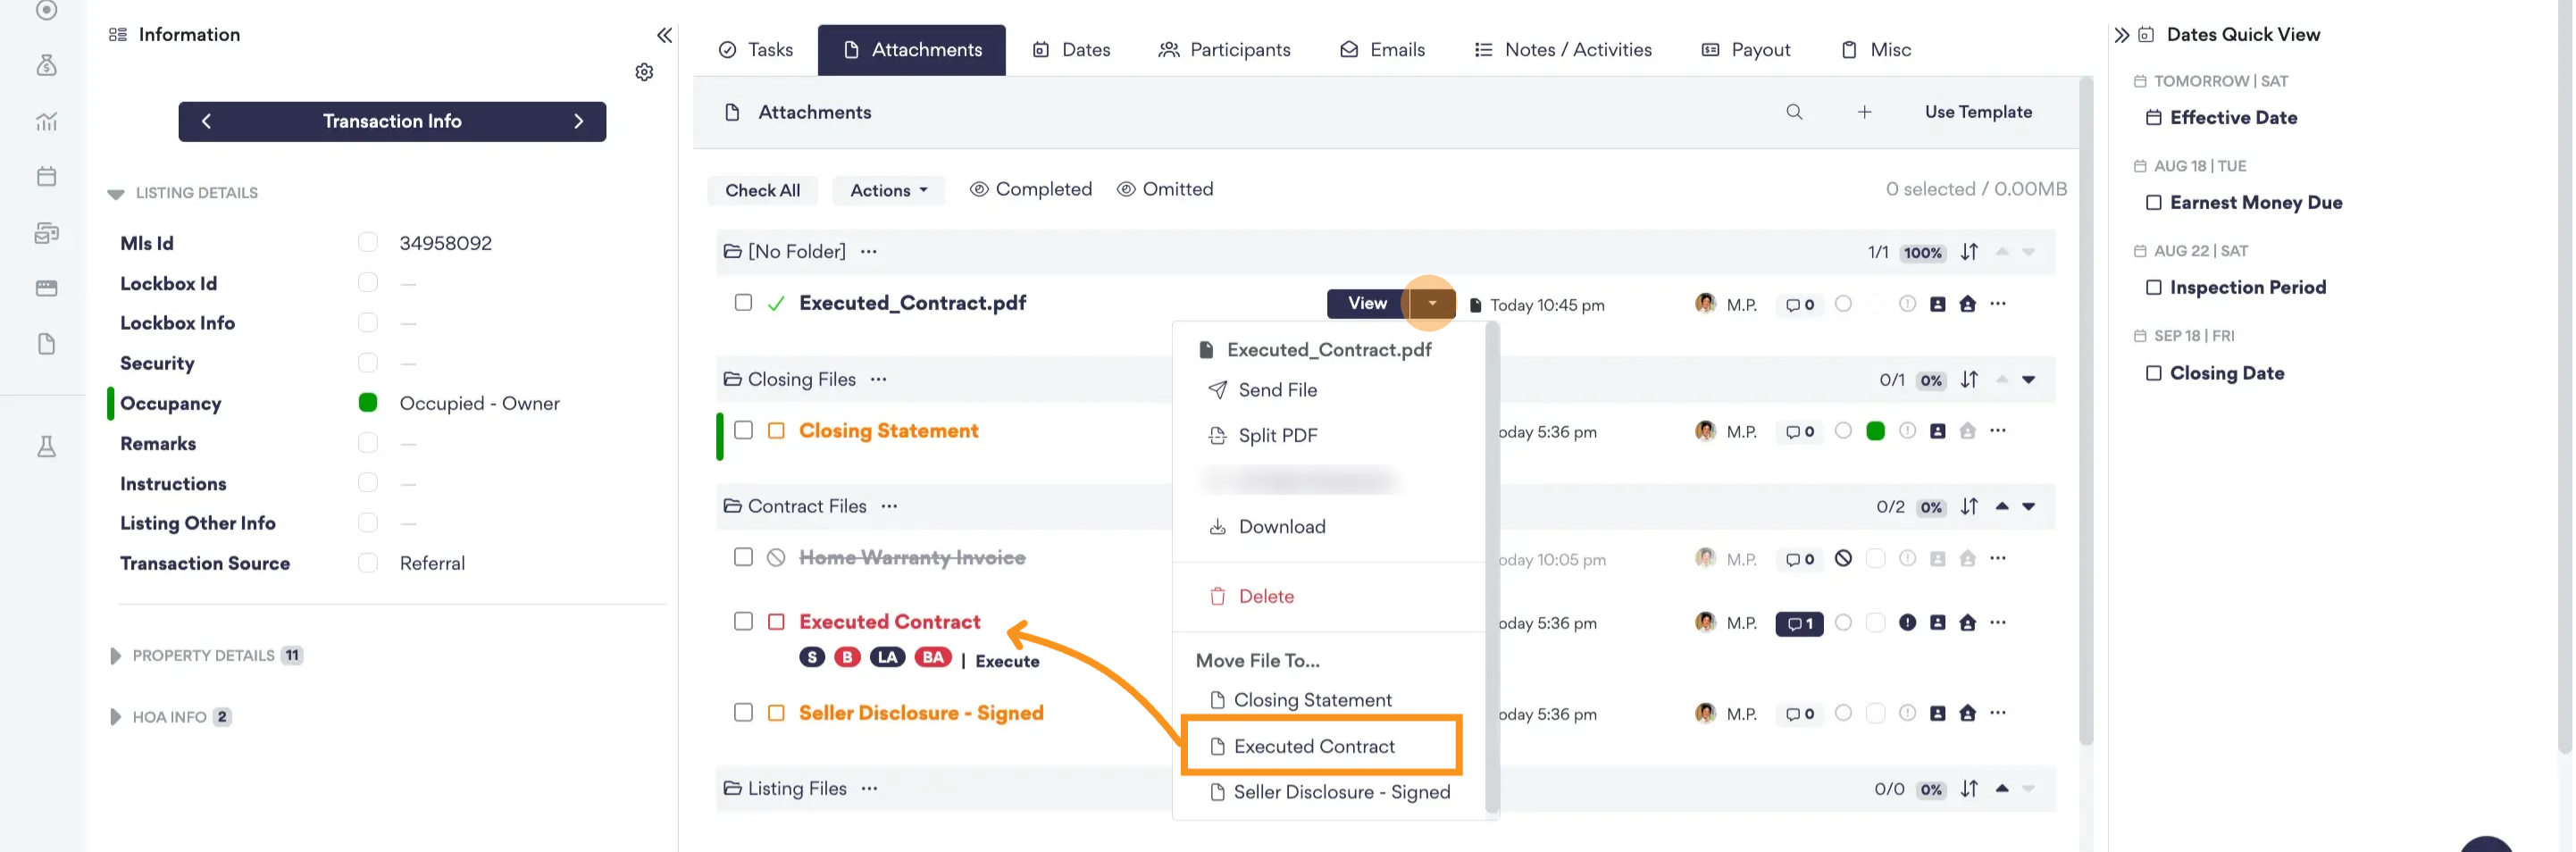
- Move To Folder: Select attachment(s) → Actions → Move To Folder
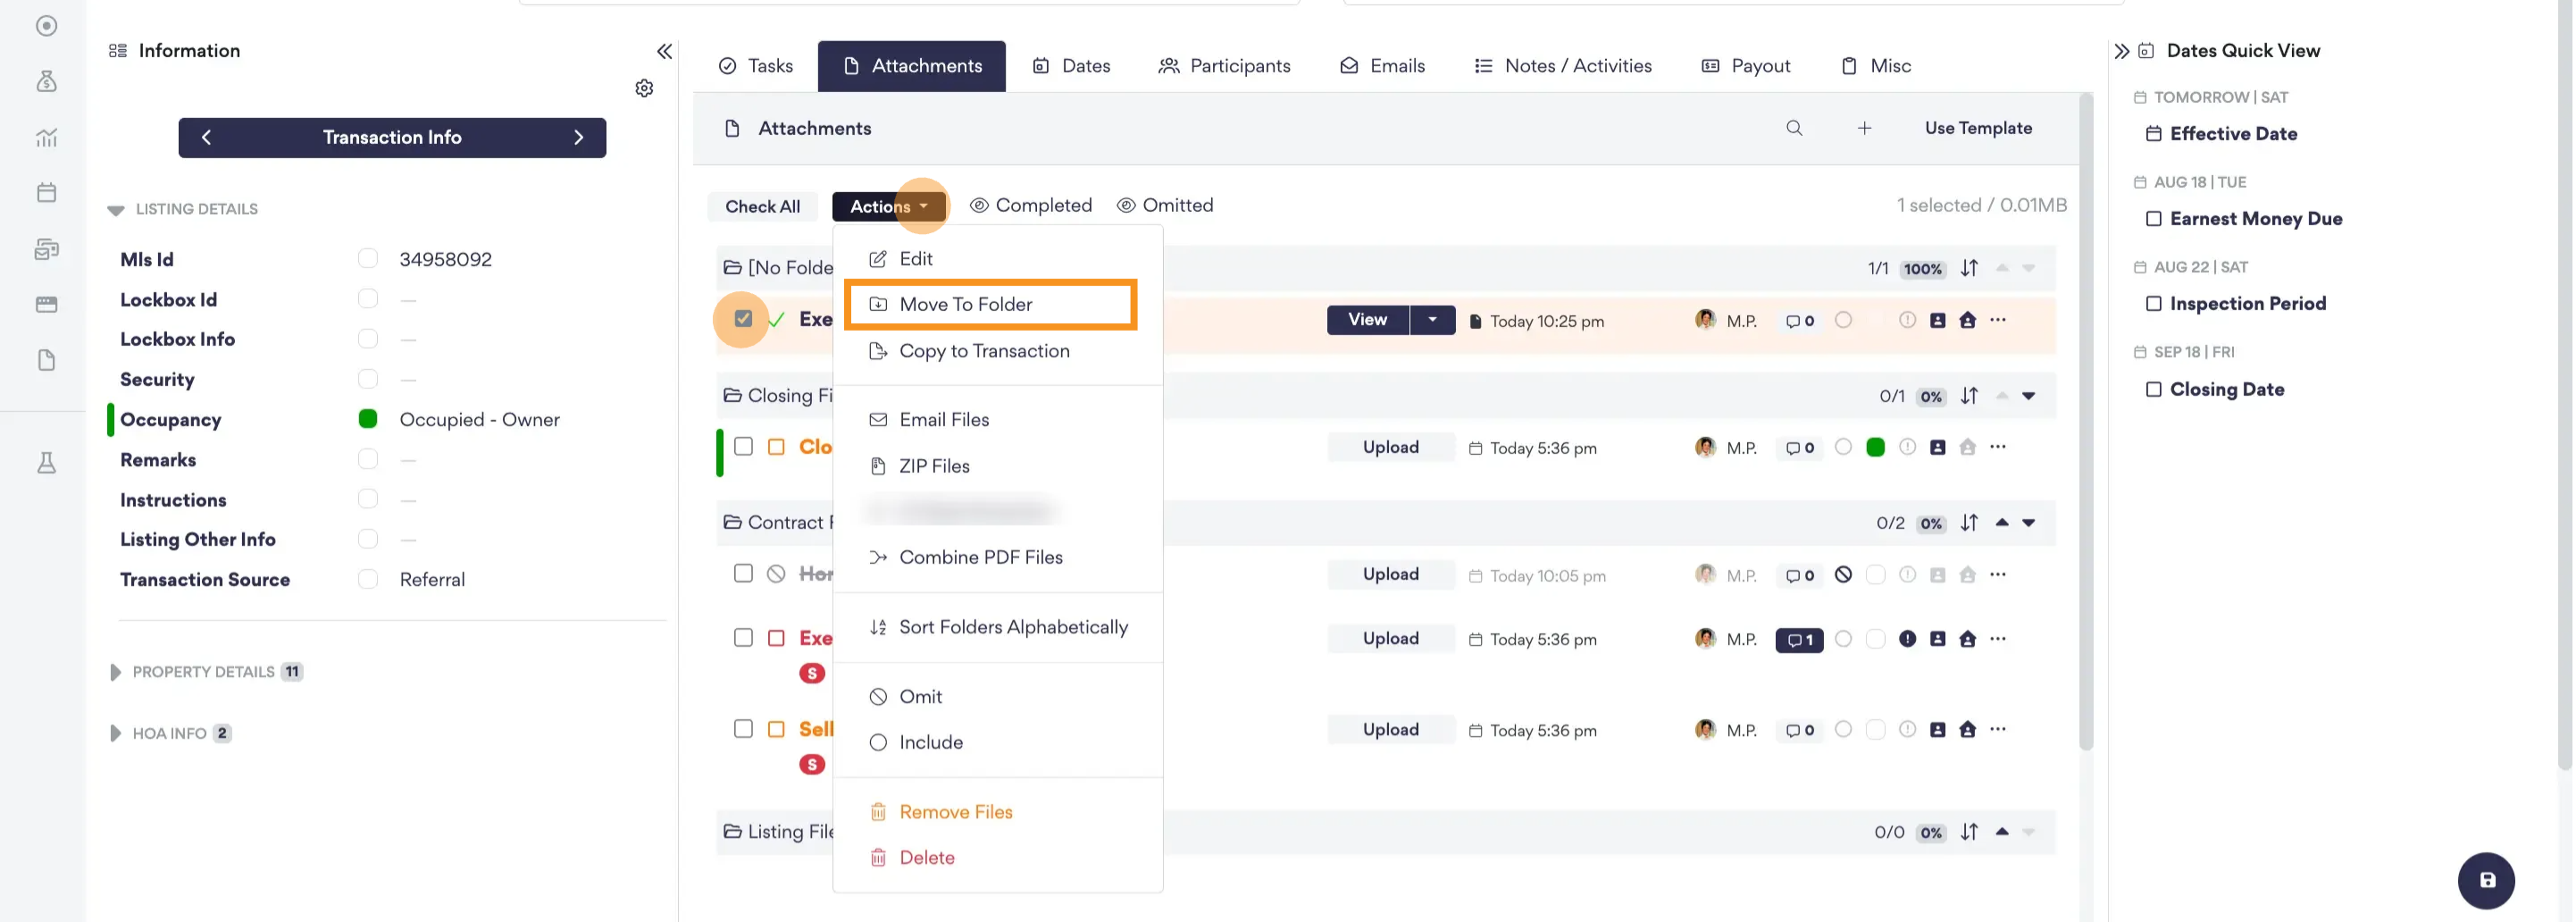
Send
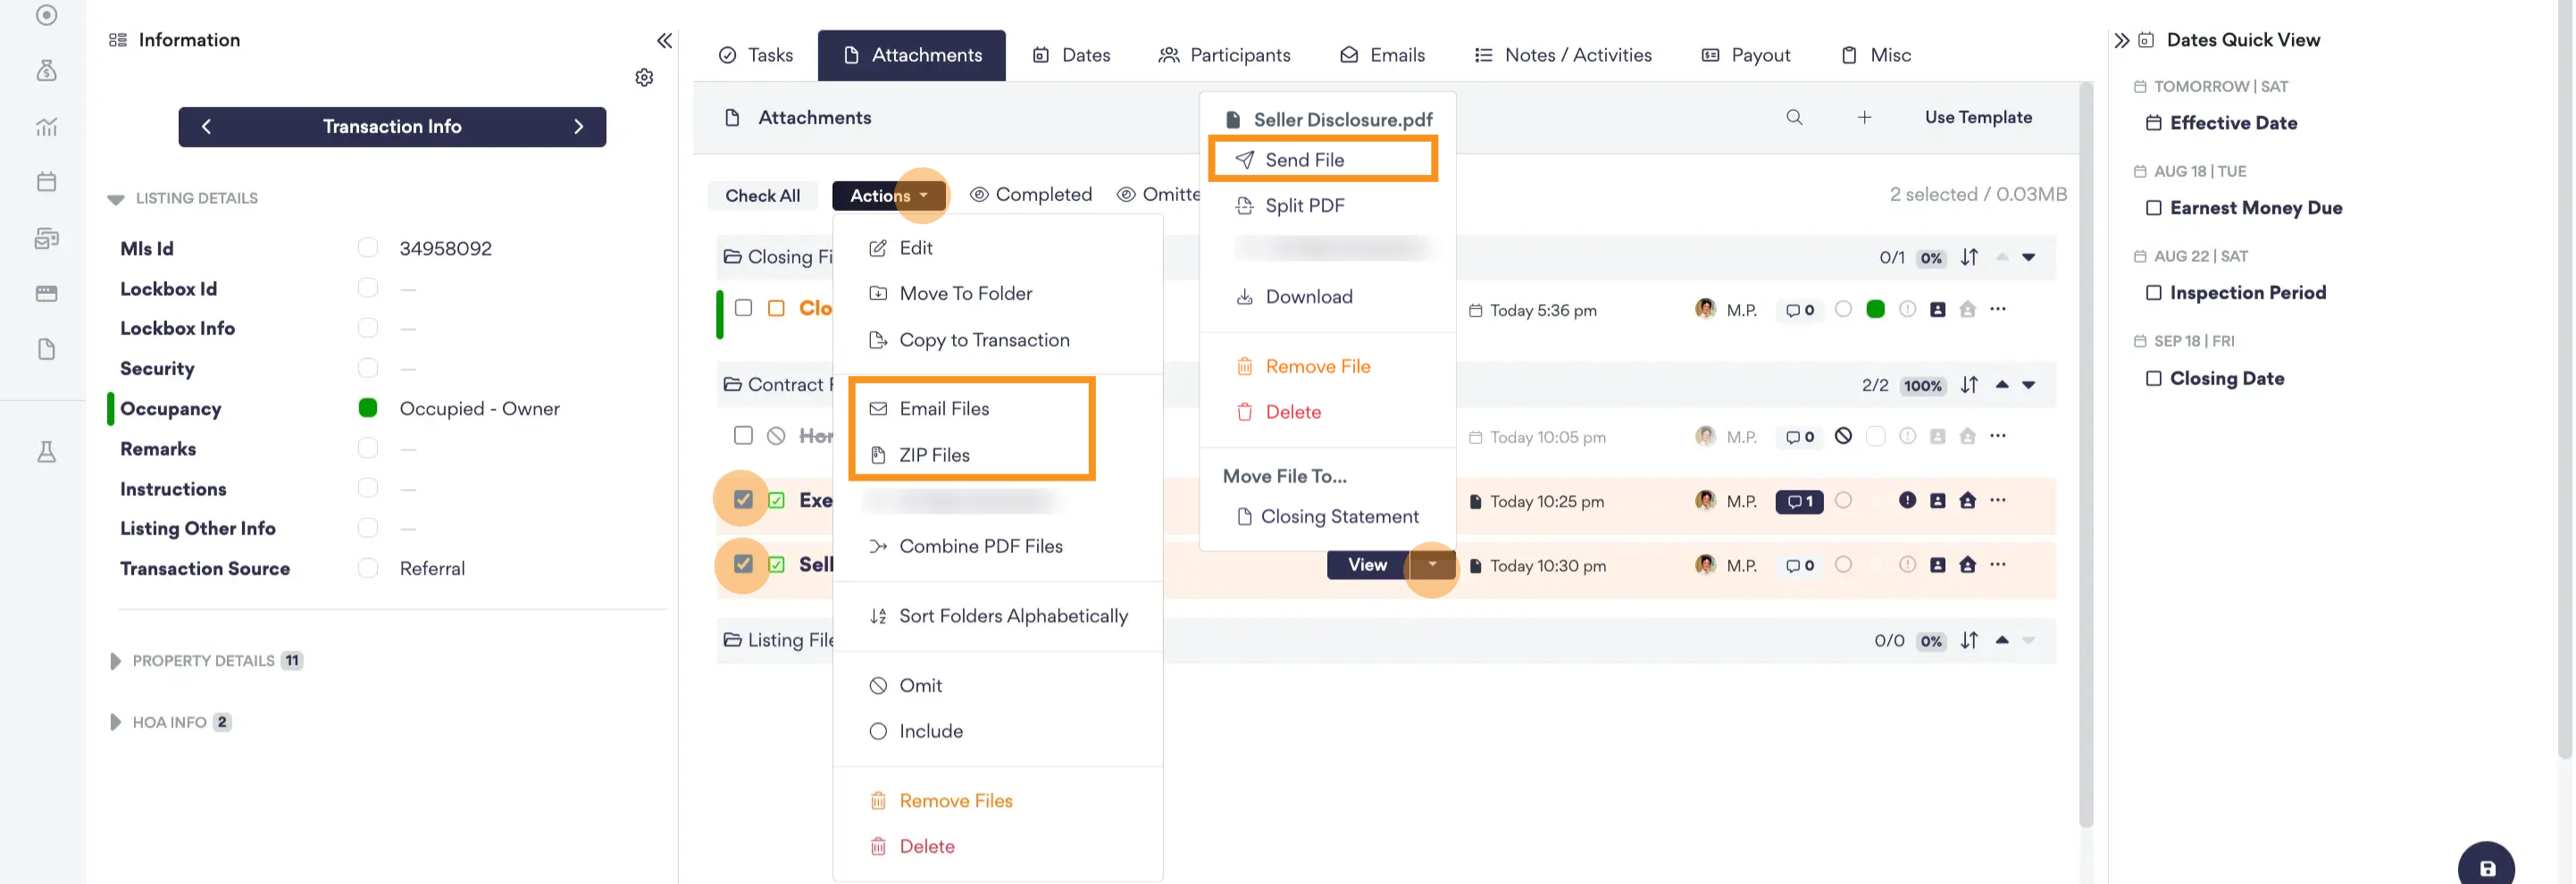
- From Attachment Tab:
Multiple: Select Attachment(s) → Actions → Email Files or Zip Files
Single: File Dropdown Menu → Send File
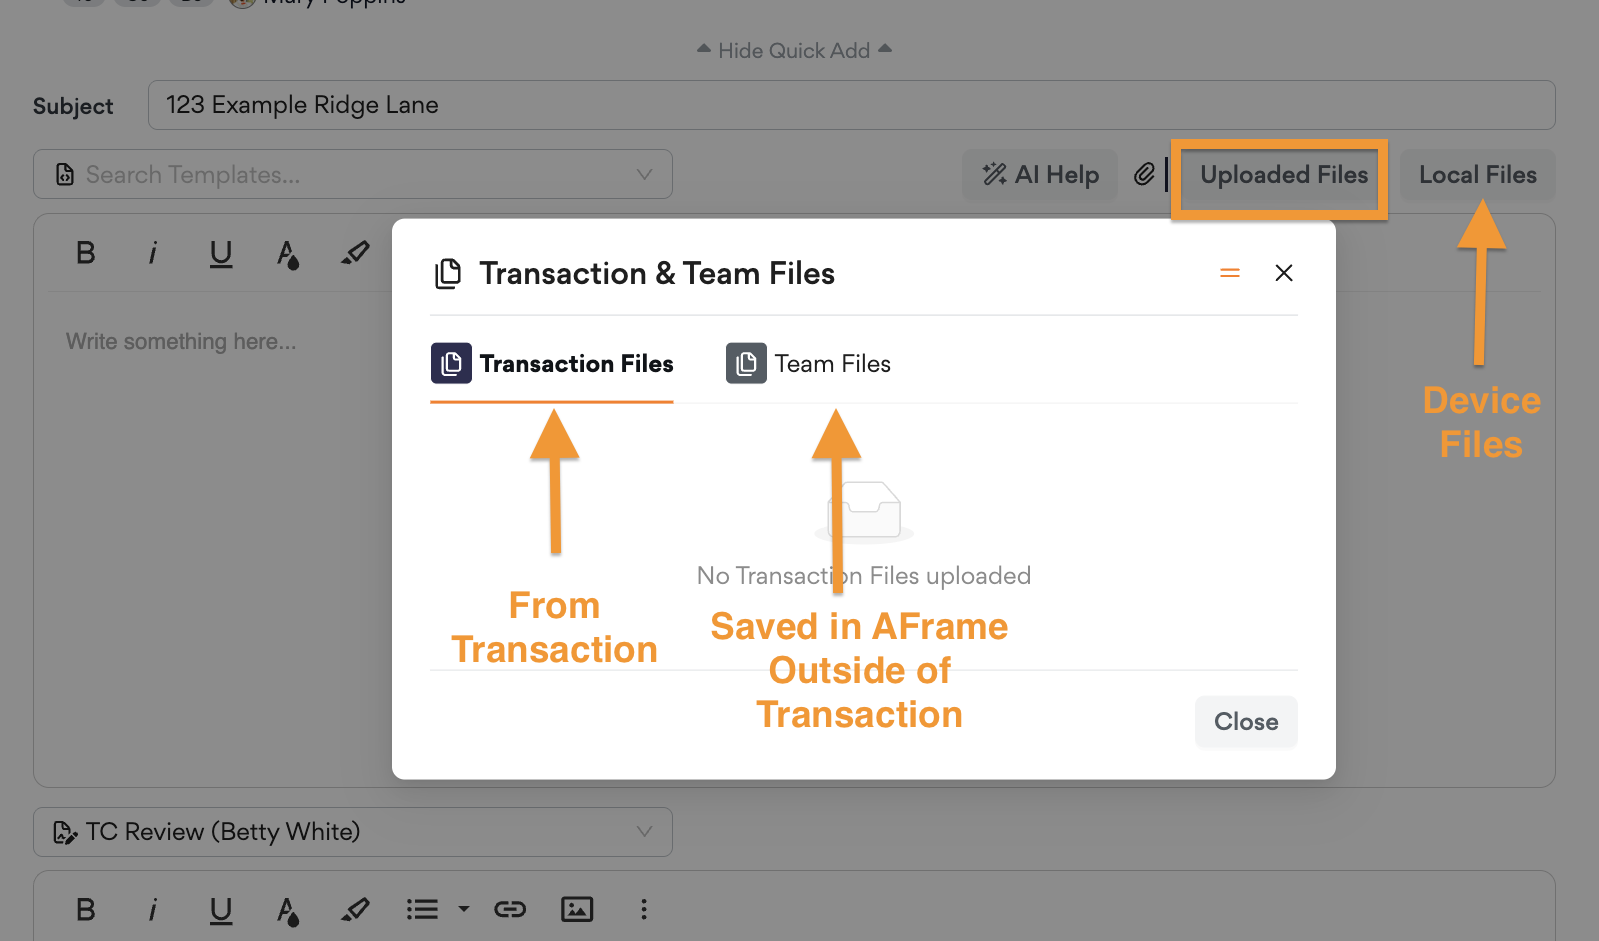
- From Email Screen: Uploaded Files → Transaction Files or Team Files
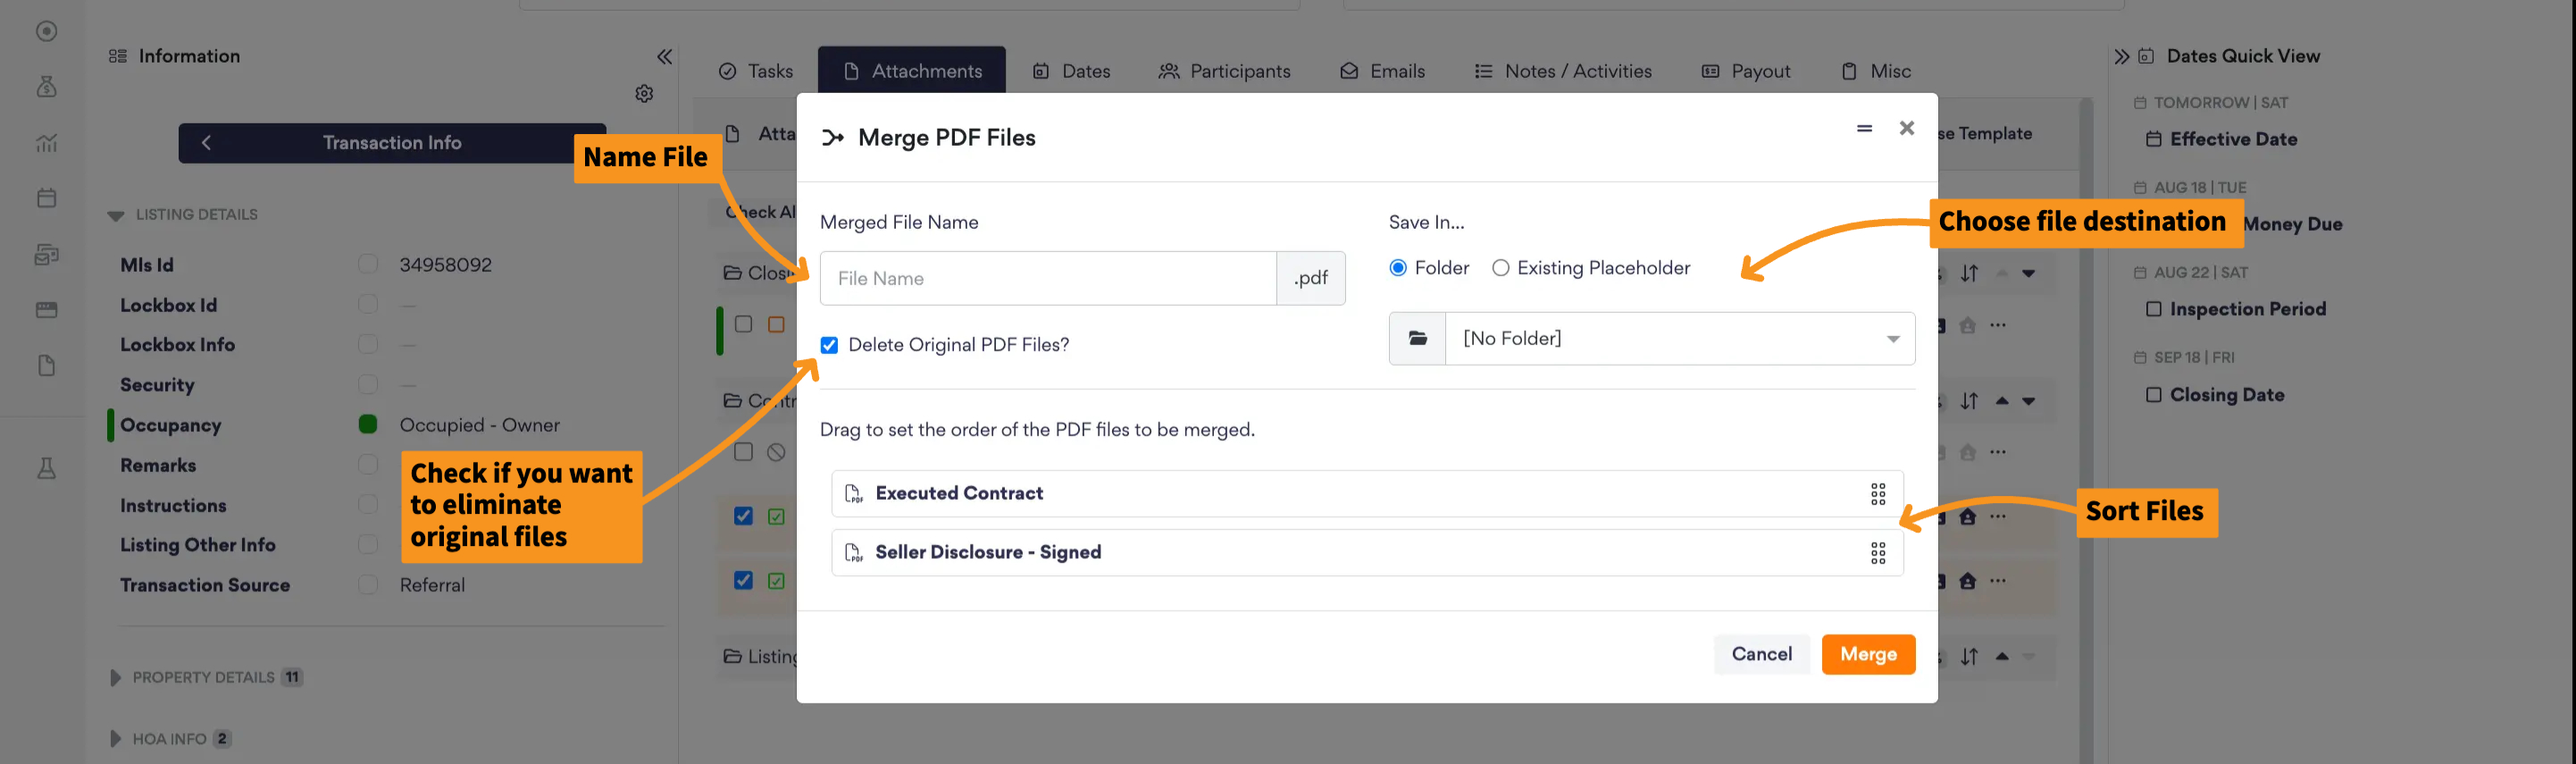
Combine PDFs
- Select Attachment(s) → Actions → Combine PDFs
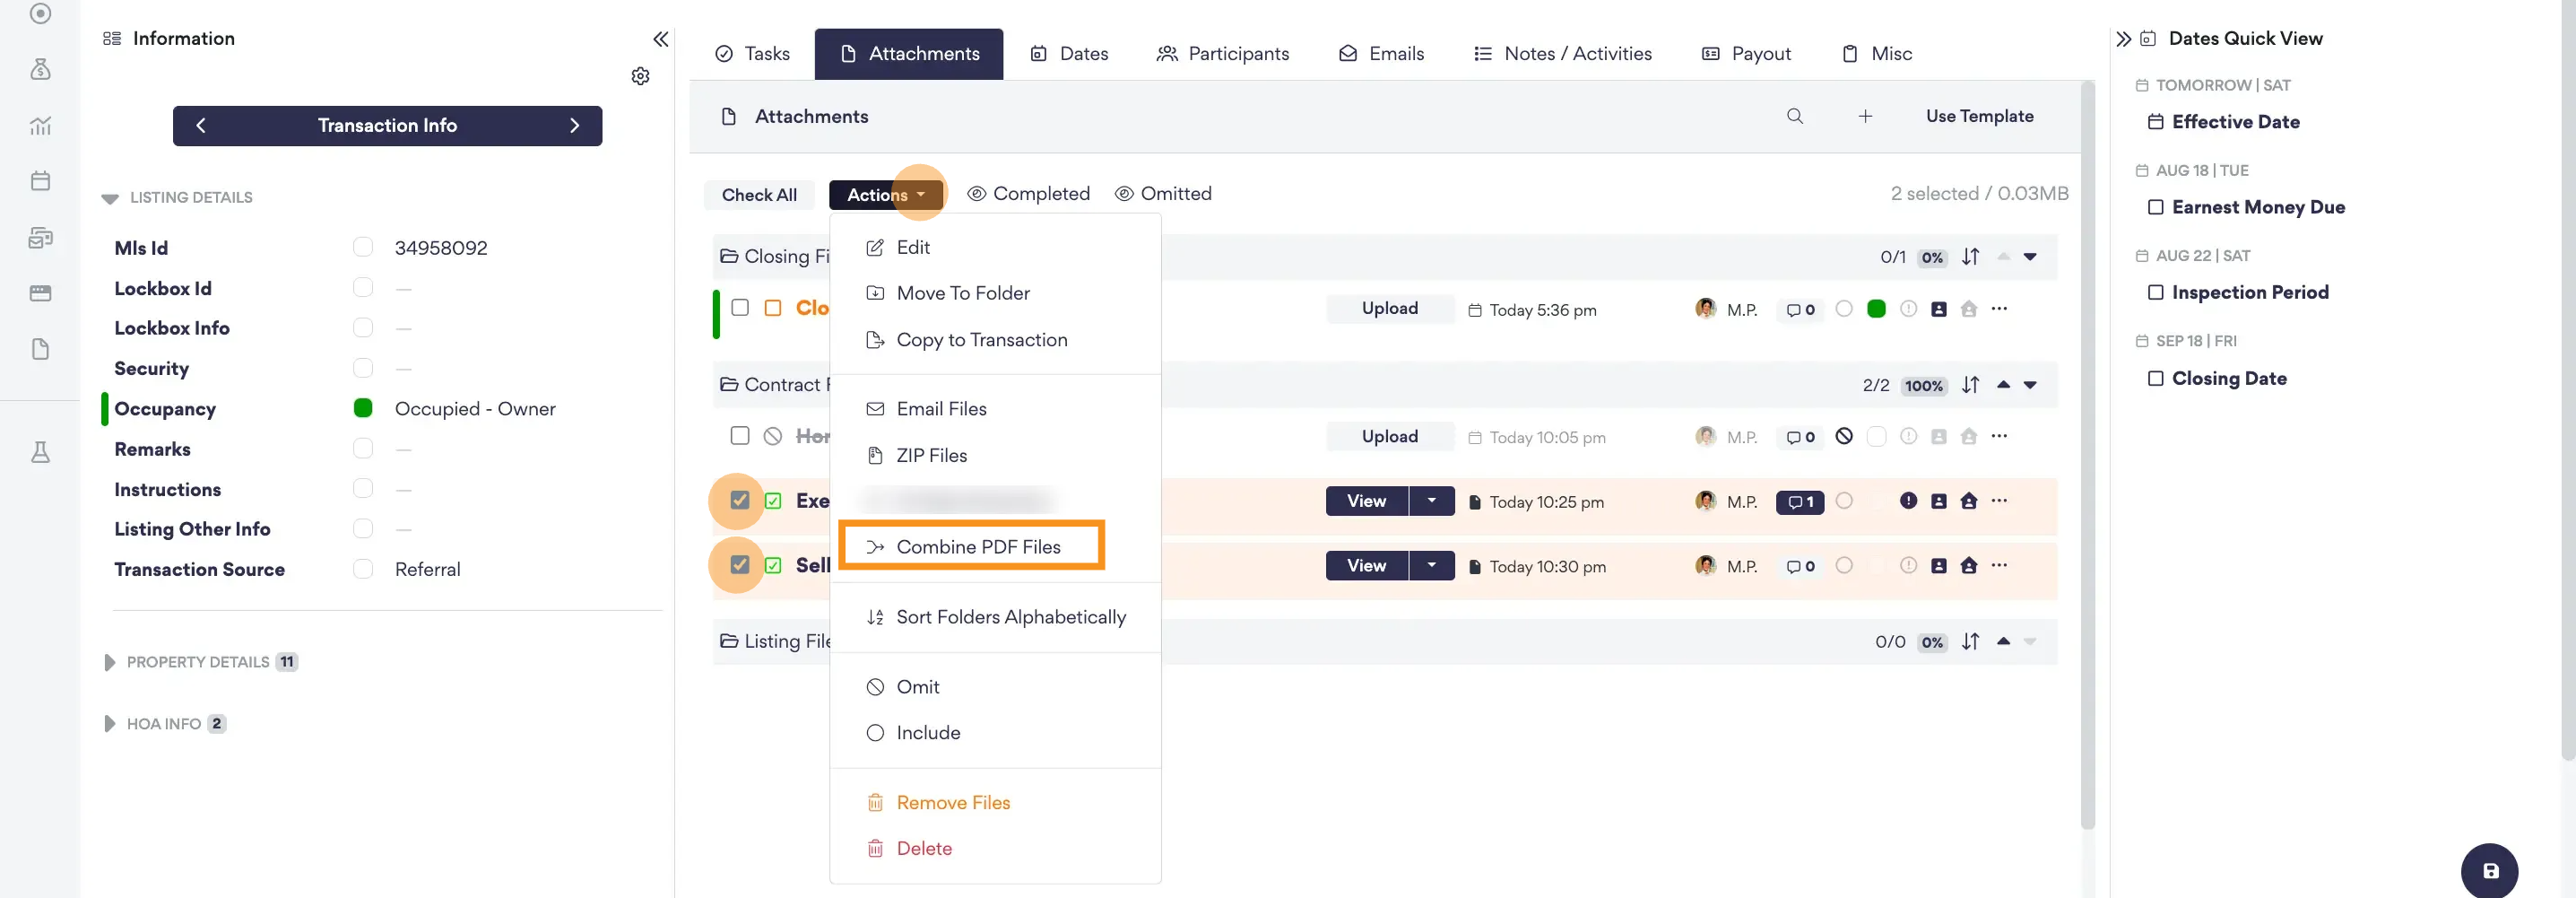
- Name Combined File → Select Folder → Sort Pages
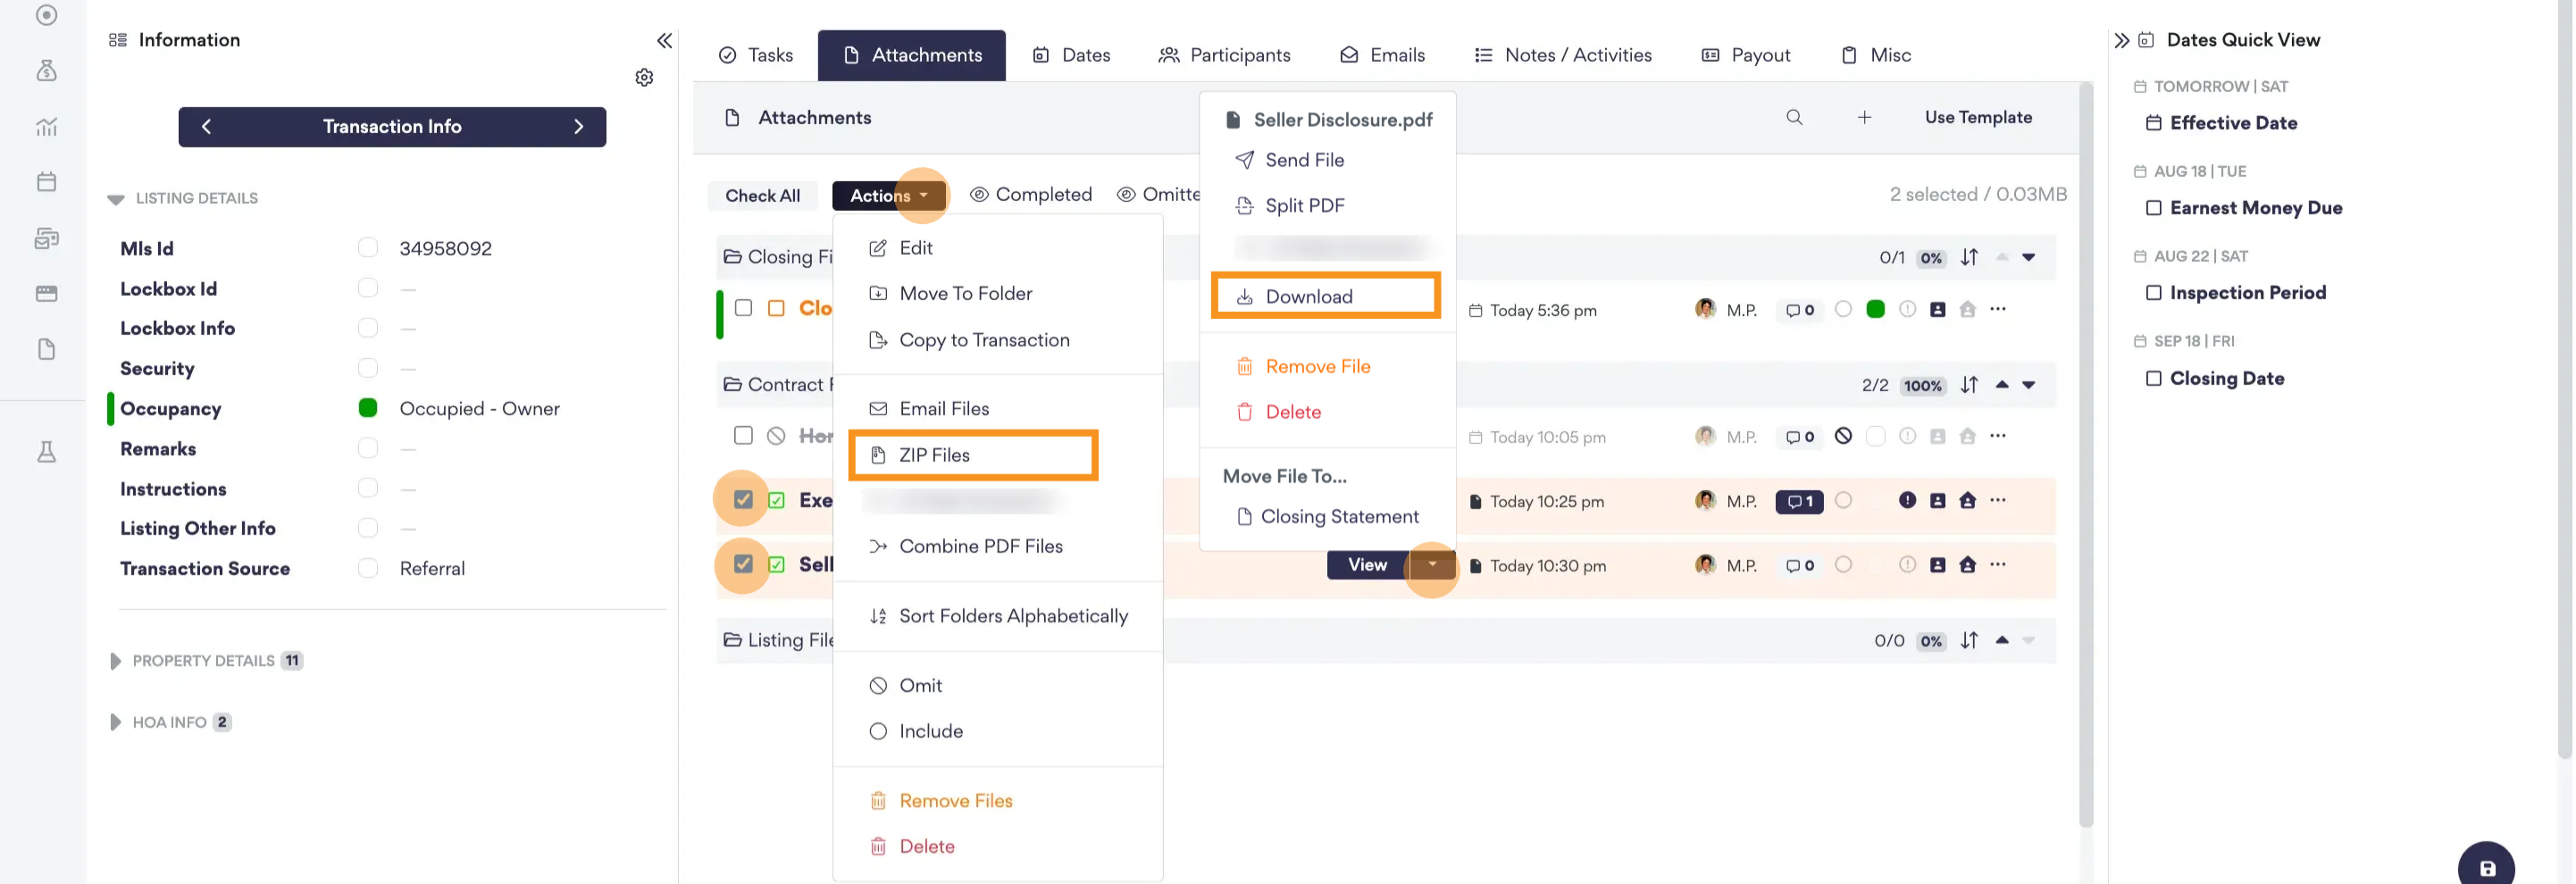
Download
- Multiple Downloads: Select attachment(s) → Actions → Zip Files → Download or Email
- Individual Download: File Dropdown Menu → Download
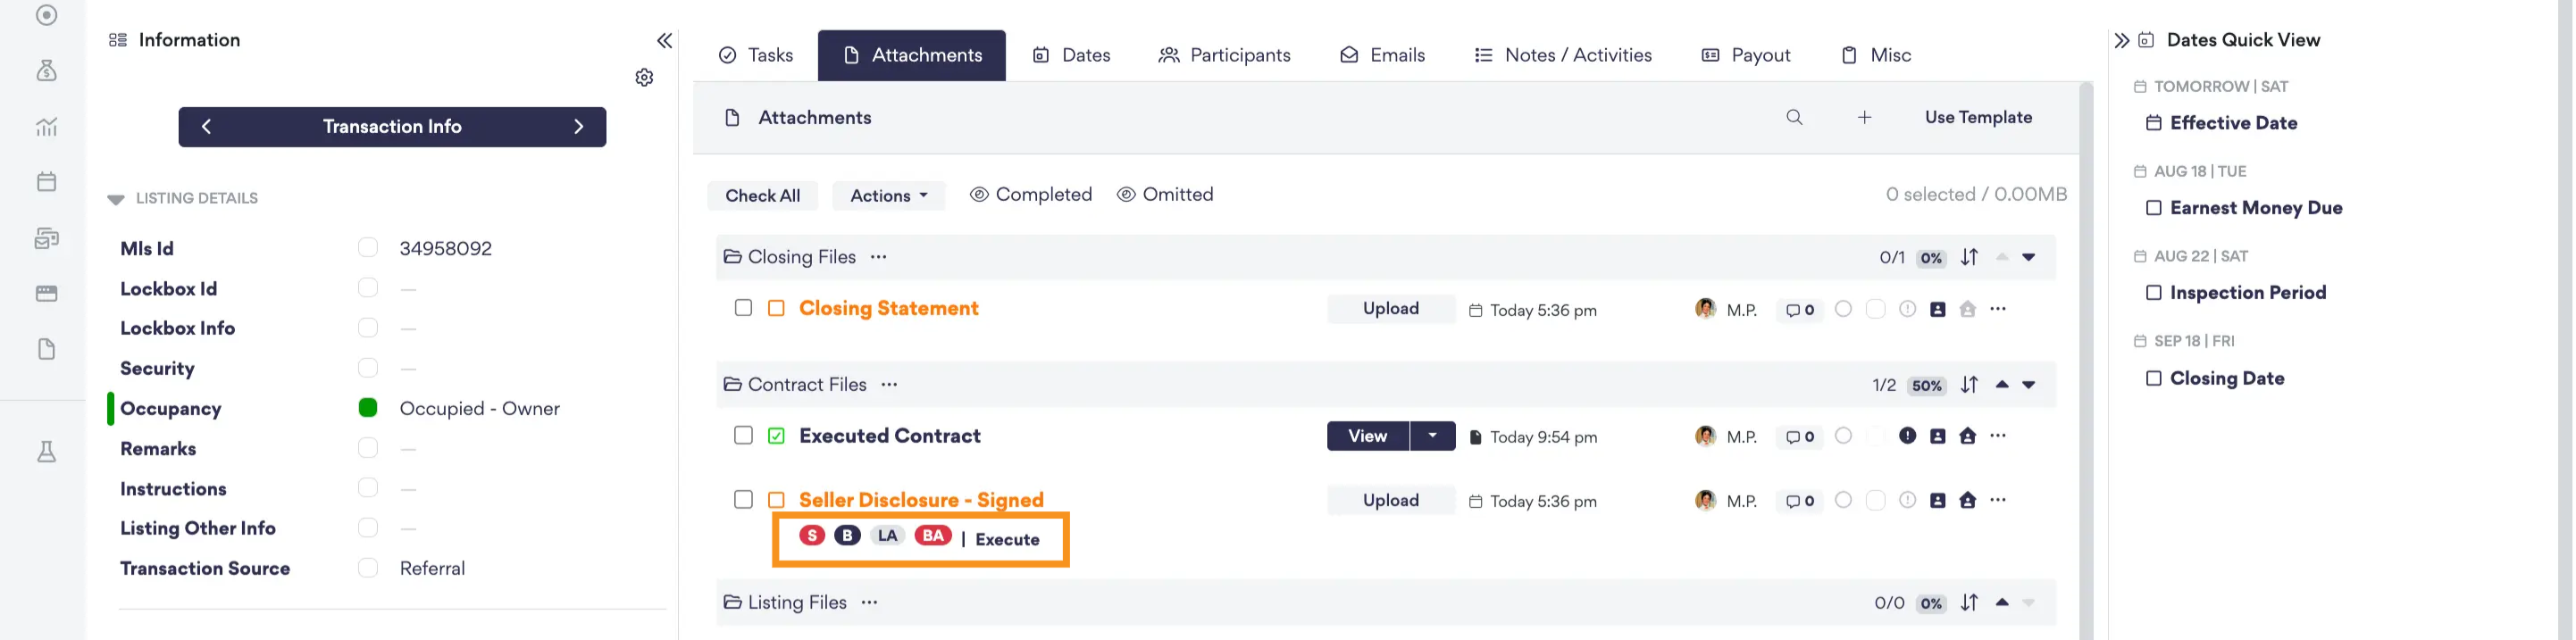
Signature Tracking
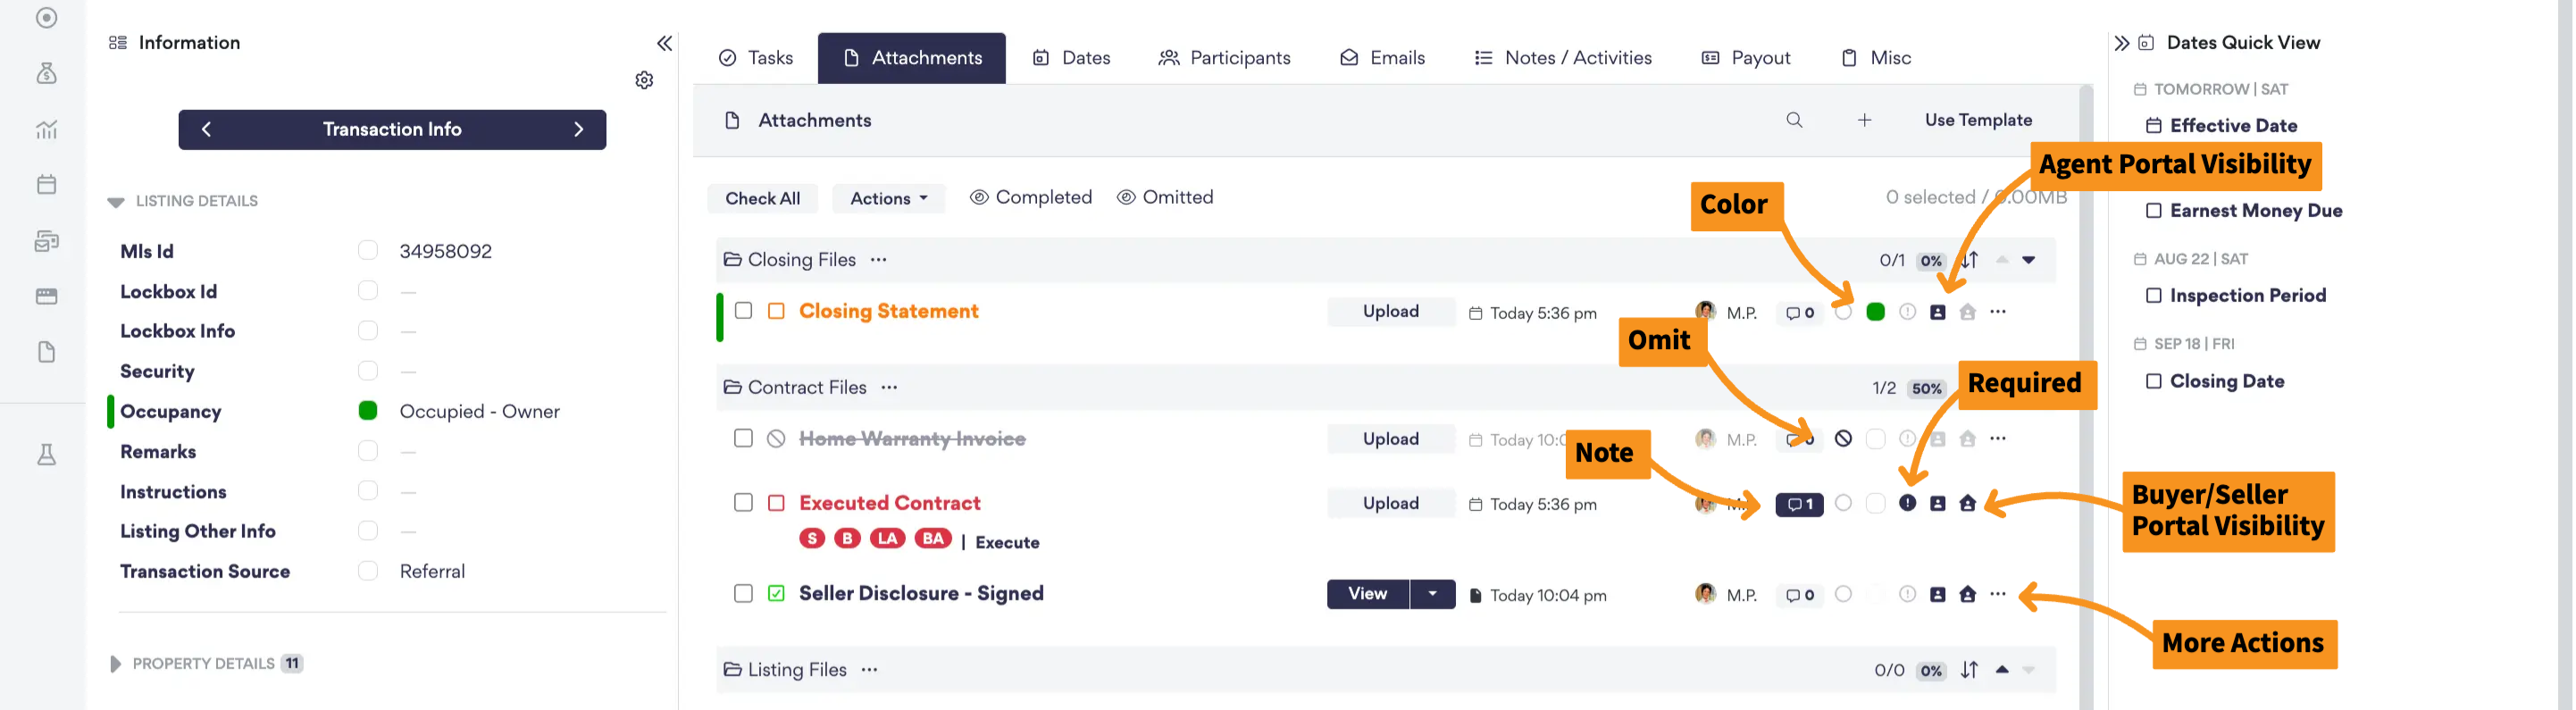
You have the option to turn on this feature for each attachment placeholder entry. You will select the roles that need to sign this document. You will be able to actively track what signatures are still needed with color indications:
- Red Role Initials = Signature Needed
- Black Role Initials = Signed
- Grey Role Inititals = No Signature Needed
Other Actions
On the right-hand side of the screen, you have a few icons to have fast access to. With these icons, you can omit a placeholder if it doesn't apply to the transaction, leave a comment, or turn on/off visibility within the agent and buyer/seller portals.